9 posts tagged with "webgl"

View All Tags

How to make your HTML5 Games Awesome!
· 12 min read
Associate Partner Support Engineer

How To Make Your HTML5 Games Awesome

The quality of a video game is often determined by how polished it is. It's the attention to detail and the finishing touches that can make a good game great. In this article, we'll take a look at the importance of polish in game development and how it can significantly enhance the overall experience.

We'll use Space Rocks!, a simple Asteroids game created with the PlayCanvas game engine to showcase how even the smallest details can make a big impact.

Game juice is a design term to refer to the small visual and audio effects that are added to a game to make it feel more satisfying to play. This can include things like screen shakes, particle effects, and sound effects that are triggered when the player takes certain actions. Game juice is all about enhancing the overall feel of a game and making it more immersive and enjoyable.

Particularly, we'll explore how game polish can be achieved through game juice.

Play it here!

How it started

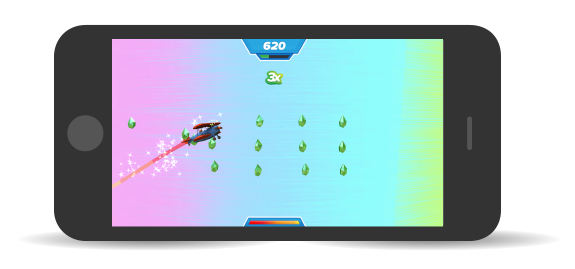
This was our starting point before we added game juice. While the game is fully functional and plays well, it lacks the visual and audio effects that would make it truly engaging. As a result, it feels a bit dull and uninteresting.

However, with the right attention to detail and some careful implementation of game juice, we can transform this basic Asteroids game into something much more exciting and satisfying to play.

What can we improve?

To think about what should have game juice, I always try to narrow down the most common interaction or core mechanic of the game. In our case, that would probably be:

  • Shooting
  • Destroying asteroids
  • Colliding with asteroids

With those three key pieces in mind, let's start thinking about how we can improve them.

For shooting

It's not very interesting right now:

Basic Shooting

If we want to change that, there's a few key things we can do. We can increase the fire rate through a script that allows us to easily control by decreasing the fire cooldown.

Gun.attributes.add('cooldown', {
type: 'number',
default: 0.25,
title: 'Cooldown',
description: 'How long the gun has to wait between firing each bullet'
});

Gun.prototype.update = function (dt) {
this._cooldownTimer -= dt;

if (this.app.mouse.isPressed(pc.MOUSEBUTTON_LEFT) && this.canFire()) {
this.fireBullet();
}
};

In fact, while we're at it, let's make shooting a bit more unpredictable. Let's add some spread to our shots!

Gun.attributes.add('spread', {
type: 'number',
default: 10,
title: 'Bullet Spread',
description: 'Up to how many degrees each bullet should vary in Y rotation.'
});

Gun.prototype.applySpreadOn = function (bullet) {
var rotation = this.entity.getEulerAngles();
rotation.y += getRandomDeviation(this.spread);
bullet.setEulerAngles(rotation);
};

A simple but impactful change! Here's how it looks with values I put in for some fun:

Shooting Spread Effect

I highly encourage you to play with these values to see what's fun for you!

It's getting better, but still not there. Let's think about more visual aspects now. What more can we do to make it more visually appealing?

PlayCanvas has a nice feature that allows you to have tons of lights in your scene with very little performance impact! It's called ✨ Clustered Lighting ✨.

We can actually leverage this amazing tech to give every single one of our bullets a point light - this makes the scene considerably more dynamic as everything gets lit up when we fire!

As another touch, let's add a few sparkles when our shots hit something! The extra visual effect will make a big difference instead of just letting our bullets disappear. Particle explosions are always awesome.

Shooting With Particles

Awesome! Our bullets look pretty nice. But we’re still shooting at fairly dull asteroids. Let's make a few changes.

Destroying Asteroids

Firstly, we want our asteroids to stand out from our background. Let's change the background texture to something a bit brighter.

New Background Texture

Much better! But can we make the asteroids themselves prettier? They're currently mapped with a fairly low resolution texture. Moreover, there's no variety - all asteroids are the same, only rotated differently.

Let's import a new mesh and texture for the asteroids.

New Asteroid Model

Nice! Much more visible, and much more variety - I should note I went ahead and added a simple component that further randomizes the scale of the asteroids being spawned!

var ScaleRandomizer = pc.createScript('scaleRandomizer');

ScaleRandomizer.attributes.add('baseScale', {
type: 'number',
title: 'Base Scale',
description: 'The base scale to deviate from'
});

ScaleRandomizer.attributes.add('scaleDeviation', {
type: 'number',
title: 'Scale Deviation',
description: 'The amount by which the effective scale should deviate from the base scale'
});

// initialize code called once per entity
ScaleRandomizer.prototype.initialize = function () {
this.entity.setLocalScale(this.getRandomScale());
};

ScaleRandomizer.prototype.getRandomScale = function () {
var deviation = getRandomFloatDeviation(this.scaleDeviation, 3);
var randomScale = this.baseScale + deviation;

return new pc.Vec3(randomScale, randomScale, randomScale);
};

Awesome, the asteroids look much nicer. Let's turn our attention back to our background for a moment as it looks very static.

  • Could we give it some life by adding some ‘background’ asteroids?
  • Could we even make destroyed asteroids leave pieces behind as we destroy them?
  • The game currently gets harder as time goes on. Maybe we can indicate that visually somehow? Maybe by changing the background texture?

Let's implement these ideas!

For the background asteroids, I simply reused our asteroid spawner class, but moved the spawn points a bit below.

Spawner Script UI

To make it as non-impactful on performance as possible, I duplicated our template, renamed it to FakeAsteroid and removed all components, except the Mover and Rotator components.

This is one of the beauties of using a component-based architecture! It allows you to quickly alter the behavior of objects without having to write or modify code at all!

I also made the FakeAsteroid texture much darker, so as not to distract or confuse the player.

My approach to the ‘fragment’ asteroids was similar, except I made them much smaller, and gave the regular asteroids a component to spawn fragments on death.

FragmentSpawner.attributes.add('minMaxCount', {
type: 'vec2',
title: 'Min, Max Count',
description: 'The minimum and maximum amount of fragments to spawn.'
});

FragmentSpawner.prototype.spawnFragments = function () {
if (FragmentSpawner.fragmentParent === null) {
return;
}

var spawnCount = getRandomInRange(this.minMaxCount.x, this.minMaxCount.y);

for (i = 0; i < spawnCount; i++) {
this.spawnSingleFragment();
}
};

FragmentSpawner.prototype.spawnSingleFragment = function () {
var fragment = this.fragmentTemplate.resource.instantiate();
fragment.reparent(FragmentSpawner.fragmentParent);
var position = this.getFragmentPosition();
fragment.setPosition(position);
};

And, while we’re at it, why don't we add a dust puff and small particles when the asteroid gets destroyed to complement our fragments?

I gathered a few textures online, duplicated our bullet hit particle effects and modified them. To spawn the particle effects, I used the same component I had used in the bullet:

// A script that spawns a particle effect on death
var DeathEffect = pc.createScript('deathEffect');

DeathEffect.attributes.add('particleEffects', {
type: 'asset',
assetType: 'template',
array: true,
title: 'Particle Effect Templates',
});

DeathEffect.effectParent = null;

// initialize code called once per entity
DeathEffect.prototype.initialize = function () {
this.entity.on('destroy', this.onDestroy, this);

if (!DeathEffect.effectParent) {
DeathEffect.effectParent = this.entity.parent;
}
};

DeathEffect.prototype.onDestroy = function () {
for (var i = 0; i < this.particleEffects.length; i++) {
var effect = this.particleEffects[i].resource.instantiate();
effect.setPosition(this.entity.getPosition());
effect.reparent(effectParent);
}
};

And lastly for the background, I added a script to lerp the transparency of our blue space material towards 0. This slowly reveals a purple material underneath.

// A script that manages ambient color.
var AmbientManager = pc.createScript('ambientManager');

AmbientManager.attributes.add('startingColor', {
type: 'rgba',
title: 'Starting Color',
description: 'The starting color for the ambient'
});

AmbientManager.attributes.add('finalColor', {
type: 'rgba',
title: 'Final Color',
description: 'The final color for the ambient'
});

AmbientManager.attributes.add('targetMaterial', {
type: 'asset',
assetType: 'material',
title: 'Target Material',
description: 'The material whose color to set (Matching the ambient color)'
});

// initialize code called once per entity
AmbientManager.prototype.initialize = function () {
this.updateTransition(0);
};

AmbientManager.prototype.updateTransition = function (transitionProgress) {
var color = new pc.Color();
color.lerp(this.startingColor, this.finalColor, transitionProgress);

var mat = this.targetMaterial.resource;
mat.emissive = color;
mat.opacity = color.a;
mat.update();
};

Here's the end result with all of our asteroid changes:

It looks amazingly better! Already a massive difference from our starting point.

Colliding With Asteroids

The last piece of the puzzle is when asteroids hit us! It needs to feel impactful! As if you were in a car, and the car just went over a bump.

We'll want to communicate it a bit better. Right now, all that happens is that the ‘n lives left’ counter in the top left gets decremented. Not only does it need to be obvious that we've got hit, but the player must be able to consult how many lives left he has at a glance.

I downloaded the model for our spaceship, and made a top-down render of it in Blender. The result was a simple plain icon:

Spaceship Icon

Plain, but enough to make a health counter with. Let's make it semi transparent and add it to the world. Our health counter will display from one to three of these icons to indicate how much life we've got left.

To give it some more juice, let's also make it ‘jump up’ when our health changes, and rotate it inwards towards the game world, to give it a 3D appearance.

And, since using components makes it easy, let's do the same to our score counter:

Score Counter

Much simpler, and much nicer!

Next up, let's try to emulate that ‘bump’ feeling. We can do this by adding some screen shake whenever we get hit! And for extra impact, we can make it slow-mo as well!

Making it slow mo is fairly simple - one component does it:

var BulletTimeEffect = pc.createScript('bulletTimeEffect');

BulletTimeEffect.attributes.add('effectDuration', {
type: 'number',
default: 1,
title: 'Effect Duration',
description: 'How long the bullet time effect should last.'
});

BulletTimeEffect.attributes.add('timeCurve', {
type: 'curve',
title: 'Time Curve',
description: 'How much the time scale should be over unscaled time.'
});

// initialize code called once per entity
BulletTimeEffect.prototype.initialize = function () {
this._time = 0;
this.entity.on('destroy', function () {
this.app.timeScale = 1;
}, this);
};

// update code called every frame
BulletTimeEffect.prototype.update = function (dt) {
this._time += (dt / this.app.timeScale) / this.effectDuration;
this.app.timeScale = this.timeCurve.value(this._time);
this.app.timeScale = Math.min(1, this.app.timeScale);
};

As for making the screen shake, it's a bit more complex (though certainly not magic!). The underlying logic is to simply move the camera randomly. To do so, we can use a script that tracks the camera's original position, and translates it randomly. We reset to the original position at the beginning of each new frame, and repeat.

this.entity.setPosition(originalPosition);
this.entity.translate(this.getRandomTranslation());

The above getRandomTranslation() method could simply return a random Vector3, and it would work. Problem is, though, this approach can make the camera feel like it is jittering, not shaking, particularly if the shake distance is large. This can cause motion sickness.

What else can we do then? Well, there is a more mathematically complex way of getting a random number - one that makes it so that our shaking is smooth, not jittery. This way of getting a random number is Perlin Noise!

Perlin Noise is used to create awesome things all over media, from explosion visual effects to Minecraft's world generation. If you're interested in the math or simply curious, you can learn more in this excellent article.

Let's go with Perlin Noise for our game. You can see the implementation we went with in the perlin-camera-shake.js and perlin-noise.js script.

Lastly, let's add a small shockwave whenever we get hit! Let's use a particle system for this - just like with the asteroid explosion and bullet hit effects. I grabbed a simple circular texture, coloured it red to indicate something negative, and added a script that spawns the effect whenever the player gets hit.

The combined effects look like this:

You'll notice I've added screen shake to more than just the player getting hit! I'm a big fan of this effect, so I've added it to asteroid explosions and firing bullets as well!

And that about does it

With the effects we added above, the game looks and plays entirely different. Destroying asteroids feels good, and everything else in the game is there to enhance that experience.

Finished Game

As a last finishing touch, I went ahead and added a few post-processing effects that PlayCanvas offers. Namely, Vignette, Bloom and Chromatic Aberration. I also added CRT Scanlines as an overlay for a retro effect.

I hope this guide has been useful to you! Take a look at the project, it is public and is accessible as a Game Demo in our documentation.

PlayCanvas is an excellent cloud-based game engine that allows you to build games for the browser. It has an amazing editor that allows you to use it as if it were Unity or Unreal - which most developers are accustomed to.

Want to learn more?

Here's a few resources if you want to try and make something similar to juice up your game!

PlayCanvas is an awesome web-first game engine that runs on the cloud. You don't need to download anything, and it's free!

PlayCanvas - The Web-First Game Engine

This one reddit post sums up many tricks you can do in about 60 seconds!

Juice your game in 60 seconds

There's this very nice GDC talk that goes into game juice a bit more deeply. Tons of useful information there!

Juice it or lose it - a talk by Martin Jonasson & Petri Purho

And there's this awesome INDIGO class that goes in-depth about my favorite game juice - screen shake!

Vlambeer - The art of screenshake by Jan Willem Nijman

PlayCanvas now supports Microsoft volumetric video playback

· 10 min read
Steven Yau
Partner Relations Manager

Open in new tab

We are very excited to release our showcase demo for Microsoft Mixed Reality Capture Studios (MRCS) volumetric video technology.

PlayCanvas now supports MRCS volumetric video with a playback library for captured footage at their studios. Watch it on desktop, mobile with AR or even in a WebXR-enabled VR headset, all from a single URL!

The library can be easily added to any PlayCanvas project and used to create fantastic immersive mixed reality experiences.

About Microsoft Mixed Reality Capture Studios

MRCS records holographic video - dynamic holograms of people and performances. Your audiences can interact with your holograms in augmented reality, virtual reality and on 2D screens.

They are experts at capturing holographic video, advancing capture technology and have been pioneering its applications since 2010.

Learn more about Microsoft Mixed Reality Capture Studios here.

How was this created?

The demo was created with a combination of several tutorials and kits available on the PlayCanvas Developer Site, the MRCS playback library and freely available online assets.

You can find the public project for the demo here. We've removed the URL to the volumetric video file (due to distribution rights) and the proprietary MRCS devkit library. Please contact MRCS to gain access to the library and example videos.

Microsoft Video Playback Library

In the folder 'holo video', you will find the scripts and assets needed for playing back volumetric video. You will need to add the devkit library file name 'holo-video-object-umd.js' that will be provided from MRCS to complete the integration and be able to playback video.

Holo Video In Assets Panel

Due to the size and how the data files for the video need to be arranged, they have to be hosted on a separate web server (ideally behind a CDN service like Microsoft Azure).

The 'holo-video-player.js' script can be added to any Entity and be given a URL to the .hcap file. At runtime, the script will create the necessary meshes, materials, etc to render and playback the volumetric video.

Holo Video Script UI

Expect full documentation to be released soon on our site!

Creating a Multi Platform AR and VR experience

As you see in the video, we've made the experience available to view in the standard browser, AR on WebXR-enabled mobile devices (Android) and VR on devices like the Oculus Quest. iOS support for WebXR is in progress by the WebKit team.

This was done by combining several of our WebXR example projects and the scripts and assets can be found in the 'webxr' folder:

WebXR Folder In Assets Panel

'xr-manger.js' is controls how the XR experience is managed and handled throughout the experience:

  • Entering and leaving AR and VR.
  • Which UI buttons to show based on the XR capabilities of the device it is running on (e.g hides the VR UI button if AR is available or VR is not available).
  • Showing and hiding Entities that are specific to each experience.
  • Moving specific Entities in front of the user when in AR so the video can be seen more easily without moving.

Adding AR

AR mode was added first, taking the 'xr-manager.js' script as a base from WebXR UI Interaction tutorial. Key changes that had to be made to the project were:

  • Ensuring ‘Transparent Canvas’ is enabled in the project rendering settings.
  • Creating a second camera specifically for AR which is set to render the layers that are needed for AR (i.e. not including the skybox layer) and having a transparent clear color for video passthrough).

After copying and pasting 'the xr-manager.js' file from the tutorial project into the demo project, I hooked up the UI elements and buttons to enter AR and added extra functionality to disable and enable Entities for AR and non-AR experiences.

This was handled by adding tags to those Entities that the manager finds and disables/enables when the user starts and exits the XR experiences.

For example, I only want the AR playback controls entity to be available in AR so the tag 'ar' was added to it.

Entity Tagged With AR

There is also an additional tag 'ar-relative' that is used for entities that need to move in front of the user when the floor is found in AR. It provides a much better experience for the user as they don't have to move or look around to find the content.

When the user leaves the AR session, the Entities are moved back to their original position that were saved when they entered.

Adding VR

This was a little trickier than expected as we didn't have a complete example of the needed functionality and it also had to work with the existing AR functionality.

The goal was for the user to be able to move around holo video and also show the controllers that matched the VR input devices being used.

Our Starter Kit: VR has the scripts and functionality to interact with objects, teleport and move around an environment. We can tag entities in the scene with 'pickable' for the VR object picker logic in object-picker.js to test against when the VR input device moves or the select button is pressed.

Pickable And Teleportable Tags

Whether it is an object that we can teleport to or interact with is dependent on the other tags on the Entity.

In this case, the aim was to be able to teleport around the video so an Entity with a box render mesh was added to represent the area and 'pickable' and 'teleportable' tags were added too.

Next up was handling how the controllers should look in VR. The starter kit uses cubes to represent the controllers as they are meant to be replaced with something else by the developer.

VR Controllers

In my case, I wanted to use skinned hands or the representations of the VR controllers instead. Max (who built the PlayCanvas WebXR integration) created a project that does just that: WebXR Controller/Hand Models. And it was just a matter of merging the code and assets together.

WebXR Hand Tracking

Projected skybox

The skybox was obtained from Poly Haven and converted to a cube map with our texture tool. Donovan wrote a shader that projected the cubemap so there was a flat floor that the user could move around in.

It's a nice and easy effect that can be applied in similar scenes without having to build a model or geometry. See the scene without the effect applied (left) and with it (right):

Infinite SkyboxGround Projected Skybox

The shader code is applied by overriding the global engine chunk in projected-skybox-patch.js on application startup.

World Space UI in VR

In VR, there's no concept of 'screen space' for user interfaces so the playback/exit controls would need to be added somewhere in the world.

It was decided the controls should be placed near the holo-video and would always face the user as, generally, that is where their focus would be.

VR UI

This was done by simply having UI buttons in world space as offset child Entities of a 'pivot' Entity. The pivot Entity is positioned at the feet of the holo-video and can be rotated to face the VR camera.

This was done by simply having UI buttons in world space as offset child Entities of a 'pivot' Entity. The pivot Entity is positioned at the feet of the holo-video and can be rotated to face the VR camera.

Setting Up UI In Editor

There's a script on the pivot Entity that gets a copy of the VR camera position and sets the Y value to be the same as the pivot Entity's. It then uses that position to look at so that the UI controls always stay parallel to the floor.

The other common place to have UI controls would be somewhere relative to a tracked controller such as on the left hand/controller. I decided against this because it's not always guaranteed that the VR device would have two hands/controllers such as Google Cardboard.

As the 'floor' is just a projected skybox, a solution was needed to render the shadows of the holo-video onto the scene.

Shadow 'catcher' material

Gustav provided a material shader that would sample the shadow map and make any area that doesn't have a shadow fully transparent.

To make this a bit easier to see, I've shown where the plane would be positioned below. Anywhere where it's white on the floor plane would be fully transparent as there is no shadow being cast there.

Shadow Receiver QuadFinal Shadow Effect

Other tutorials used

There is other functionality in the experience that has been taken from our tutorial/demo project section that have been slightly modified for this project.

These include:

  • Orbit Camera for the non XR camera controls. The orbit camera controls are disabled when the camera entity is disabled so that the camera wouldn't move while in a XR session.
  • Video Textures for the Microsoft video on the information dialog. It was modified so that it would apply the video texture directly to the Element on the Entity it was attached to.

Although not PlayCanvas related, it is worth shouting out: the awesome QR code (that is displayed if the device is not XR compatible) is generated with Amazing-QR. It's able to create colorful and animated QR codes that are more interesting and attractive than the typical black and white versions.

QR Code

Issues found

There were a couple of issues found while this project was being developed. We will be searching for solutions in the near future. For now, we've worked around them in a couple of ways.

In VR, clustered lighting with shadows enabled causes a significant framerate drop. As the shadows in the project are from the directional light and they are processed outside the clustered lighting system, clustered lighting shadows can be disabled with no visual change.

The demo uses screen space UI in AR and there's an issue with accuracy of UI touch/mouse events when trying to press UI buttons. This is because, when the user enters AR, the engine uses a projection matrix that matches the device camera so that objects are rendered correctly relative to the real world.

Unfortunately, the screen-to-world projections are using the projection matrix directly and instead, using the FOV properties on the camera component. The mismatch is what is causing the inaccuracy.

My workaround is to calculate the relevant camera values from the projection matrix on the first AR render frame and apply that back to the camera component. The code can be seen here in xr-manager.js.

Wrapping up

If you have reached here, thank you very much for reading and we hope you have found some useful takeaways that you can use in your own projects!

Useful links:

We would love to get your thoughts and feedback so come join the conversation on the PlayCanvas forum!

PlayCanvas Review of 2022

· 6 min read
Steven Yau
Partner Relations Manager

Happy New Year to you all!

As we begin 2023, let’s take a moment to look back at last year’s highlights for PlayCanvas, the powerful WebGL engine and platform for creating interactive web content.

From new features and improvements to exciting projects and partnerships, PlayCanvas has had a busy and successful year. In this review, we will cover some of the key developments and achievements of the platform, and how they have helped to advance the capabilities and potential of WebGL-based content creation.

The fantastic work done by you

One of the most exciting aspects of PlayCanvas is seeing the amazing projects and work created by you!

From games and interactive experiences to architectural visualizations and simulations, the PlayCanvas community is constantly pushing the boundaries of what is possible with WebGL.

To celebrate this work, we've created a showcase video with the standout projects and work from 2022.

PlayCanvas Showcase 2022

We are looking to do more of these in 2023 so don't be shy! Share with us and the rest of the community on Twitter, forums and Discord.

We also wanted to take a deeper dive into the creative process and workflows behind these projects.

To do this, we reached out to a selection of developers who have used PlayCanvas to create fantastic content across e-commerce, WebAR, games and the metaverse.

In these Developer Spotlights, developers share their experience with PlayCanvas, the challenges and solutions they encountered during development, and the unique insights and approaches they brought to their projects.

These interviews provide valuable insights and inspiration for other PlayCanvas users and anyone interested in WebGL-based content creation.

Graphics Engine Enhancements

This year, we've been laser-focused on adding WebGPU support and glTF 2.0 spec compliance to the PlayCanvas graphics engine, and we're thrilled with the progress we've made.

With Google Chrome set to enable WebGPU by default in 2023, we're excited to be at the forefront of the future of interactive 3D content on the web, and we can't wait to see what WebGPU will allow developers to create.

WebGPU Grabpass
WebGPU Grabpass
WebGPU Clustered Lighting

In addition to WebGPU support, we've also added support for all ratified glTF 2.0 extensions to the PlayCanvas engine, complete with Editor support for iridescence and dynamic refraction. These features allow developers to create even more realistic and visually stunning 3D content.

glTF Asset Viewer

But we didn't stop there! We also released Editor support for Clustered Lighting and Area Lights, which allow developers to easily incorporate hundreds of dynamic lights into their projects. And as it turns out, our users have already been using these new features to add extra flair and fidelity to their projects.

Space Rocks
Space Rocks
Pool Demo
Pirron Pool

glTF Viewer 2.0 with AR support

We released a major update to the Model Viewer, taking it to version 2.0! This update not only improved the user experience, but also added a host of new features.

The most notable new feature is AR support with WebXR (Android) and USDZ export (iOS). This allows users to view glTF models in AR directly from the browser.

glTF Viewer AR on iOSglTF Viewer AR on Android

We've also made the UI more streamlined and mobile-friendly, grouping related functionality together for easier use. Rendering has been improved with the 'High Quality Rendering' option, which enables supersampling to smooth out jagged edges along polygons and high resolution reflections for more realistic rendering.

glTF Viwer Lamborghini Urus

Tools Updates

We've been continuously improving the Editor, making it even more powerful and user-friendly for our developers.

These include:

  • Infrastructure upgrades across the board with benefits to all users including:
    • Faster download speeds for published build zips across the world.
    • Faster asset delivery with up to 50% improvement in loading projects in the Editor and the Launch Tab.
    • Zero downtime deployment for services.
  • More powerful Scene Hierarchy Search that searches components and script names.
  • Creating Texture Tool to inspect textures and convert HDRIs to/from cubemaps (also open source!).
  • Adding GitHub sign-in.

The project dashboard has gotten a huge refresh and can be accessed in-Editor. It includes searching and sorting of the project list as well as being able to manage teams and settings without leaving the Editor!

Project Dashboard

Version Control also got some major features this year, including the addition of the Item History and Graph View, which make it easier to track changes to your projects. And looking ahead to this year, we're planning to make some of our REST API public, so developers can automate flows for CI and tools.

Version Control History

Thank You

As we wrap up our 2022 review of PlayCanvas, we want to take a moment to thank all of our users for their continued support and for the amazing projects and work they have created with PlayCanvas.

Your creativity and innovation inspire us to continue improving and expanding the capabilities of our WebGL engine and platform.

We can't wait to see what the new year brings and the incredible projects and work that our users will create with PlayCanvas. Whether you are new to PlayCanvas or a seasoned pro, we hope that you will continue to be a part of our community and push the boundaries of what is possible with WebGL-based content creation.

Thank you again, and we look forward to seeing what you will accomplish in the new year!

Arm and PlayCanvas Open Source Seemore WebGL Demo

· 2 min read

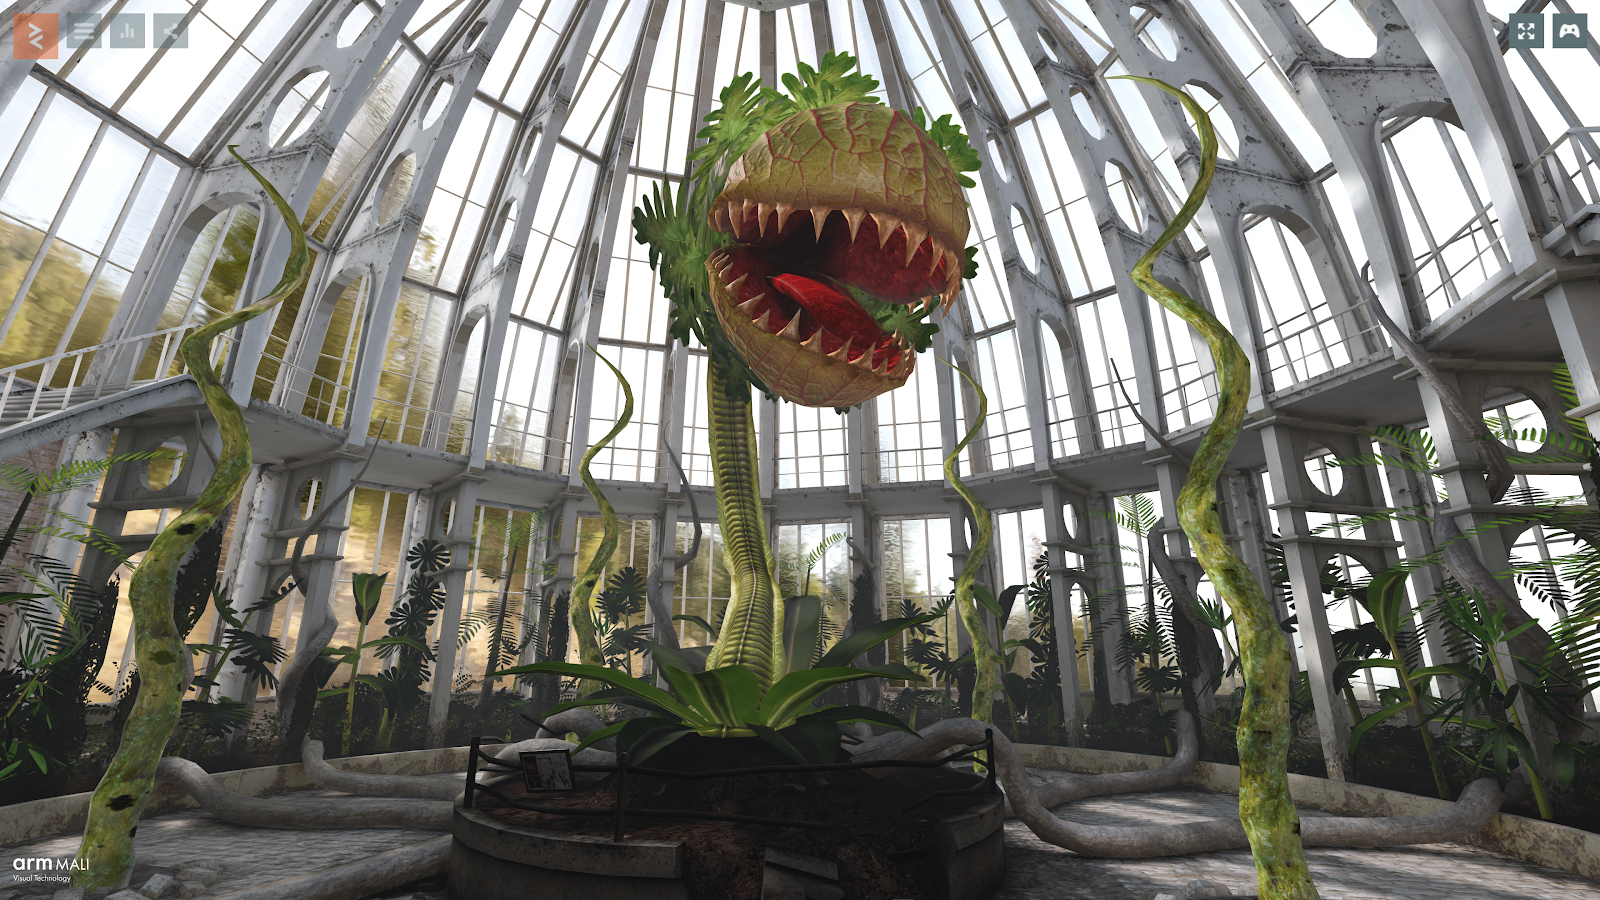
Cambridge/Santa Monica, August 1 2019 - Arm and PlayCanvas are announcing the open sourcing of the renowned Seemore WebGL demo. First published in 2016, the graphical technical demo has been completely rebuilt from the ground up to deliver even more incredible performance and visuals. With it, developers are empowered to build their projects in the most optimized way, as well as using it to incorporate some of its performant features and components into their own projects.

Seemore Demo

PLAY NOW

EXPLORE PROJECT

“I’m so excited to be relaunching the Seemore demo. Open sourcing it in partnership with Arm will bring a host of benefits to the WebGL development community,” said Will Eastcott, CEO of PlayCanvas. “It’s an incredible learning resource that provides many clean, easy to follow examples of some very advanced graphical techniques. Sharing this project publicly is going to help move web graphics forwards for everybody.”

“PlayCanvas and Arm have always strived to push the boundaries of graphics and the original demo is a testament to that,” said Pablo Fraile, Director of Developer Ecosystems at Arm. “It’s encouraging to see how PlayCanvas have advanced mobile web rendering performance since the original demo. This re-release provides a unique resource into graphics for the mobile web that is both easy to follow and incorporate into your own projects.”

The Seemore demo was originally created as a graphical showcase for the mobile browser and takes full advantage of Arm Mali GPUs. It has been upgraded to utilize the full capabilities of WebGL 2, the latest iteration of the web graphics API. Some of the main features of the demo include:

  • Physical shading with image based lighting and box-projected cube maps.
  • Stunning refraction effects.
  • HDR lightmaps.
  • Interpolated pre-baked shadow maps as a fast substitute for real time shadow-mapping.
  • ETC2 texture compression to ensure that highly detailed textures occupy only a small amount of system memory.
  • Draw call batching.
  • Asynchronous streaming of assets to ensure the demo loads in mere seconds (approximately 5x faster than the original version).
  • Fully GPU-driven mesh animation.

Seemore Demo

Mozilla Launches WebGL 2 with PlayCanvas

· 2 min read

Today is a huge milestone for real-time graphics on the web. Mozilla has launched Firefox 51, the first browser to bring WebGL 2 to the masses. WebGL has been around since 2011, the year when PlayCanvas was founded. 6 years on, the open standard for web graphics has taken a huge leap forwards, exposing far more GPU capabilities to developers, making for ever richer, more beautiful experiences.

To mark the launch of WebGL 2, Mozilla and PlayCanvas have teamed up to build 'After the Flood'.

EXPERIENCE 'AFTER THE FLOOD' NOW

'After the Flood' illustrates many of the key, new aspects of WebGL 2.

  • Transform feedback: to animate leaf particles on the GPU.
  • 3D Textures: used to create procedural clouds.
  • HDR rendering with MSAA: for correct blending of antialiased HDR surfaces.
  • Hardware PCF: for better shadow filtering at a lower cost.
  • Alpha to coverage: to render antialiased foliage.
  • ...and much more.

So how was all of this done? As you know, PlayCanvas is an open source game engine. All of the work to integrate WebGL 2 into the engine can be found on GitHub.

Other key demo features are:

  • Compressed textures: DXT, PVR and ETC1 are used to reduce VRAM usage.
  • Asynchronous asset streaming: to get the demo loading faster.
  • Runtime lightmap baking: to generate realistic shadows that render fast.
  • Procedural water ripples
  • Planar mirrors

As you can see, PlayCanvas is all about squeezing the full potential from the browser. PlayCanvas apps, like 'After the Flood', look beautiful, load fast and perform great.

So what's next? First, we will refactor and merge our WebGL 2 work into PlayCanvas' mainline codebase. Then we will enable 'After the Flood' on mobile. And finally, we will make the demo project public so you can see exactly how we made it:

After the Flood

Want to get creative with WebGL yourself?  Why not get started with PlayCanvas today?

iOS 8 launched with WebGL

· One min read

Amazing news for PlayCanvas Users, iOS 8 is out.

So we've finally seen the launch of the iOS 8. For all you PlayCanvas users out there, this is fantastic news as it means PlayCanvas games work straight off the web in mobile Safari on hundreds of millions of iPhones and iPads.

To celebrate this, we've launched a cool little demo to discover the new (and not quite released) iPhone 6. Take a look, and remember now it works on desktops, on Android and on iPhones and iPads!

iPhone 6

Share this with your iPhone using friends: http://phone.playcanvas.com/

WebGL on iPhone in less than a minute

· 2 min read

If you've been following the tech news over the last few months you'll have noticed that Apple is about to launch the latest version of their mobile operating system iOS 8. For us game developers this is awesome news because iOS 8 supports WebGL in mobile Safari (the news we broke on this blog a few months ago).

It's not just browser support for PlayCanvas games we're interested in though. We also want to make sure you can get your PlayCanvas into the App Store. So, in advance of the iOS 8 release, we're really pleased to be launching a new feature today for our Pro users.

PlayCanvas iOS Export

It's now dead simple to get your PlayCanvas game running as a native iOS application. Take a look at our little video introduction.

It's just one click to get a XCode project which is easy to build into a iPhone application.

Web vs Native

PlayCanvas is designed to use all the best features of the web, online collaboration, accessible from every device and shareable links. But that doesn't mean we don't see the advantages of native applications, especially on mobile. Installed games are run offline and can be easier to monetize.

You can now get the best of both worlds by releasing your games on the web and on iOS. Use the web to build viral, shareable games and release the same game on iOS, where the audience is ready to monetize.

Give it a try

If you're a Pro account holder, you'll see the iOS download right now in your exports tab. Get yourself a copy of the XCode 6 GM from the Apple Developer site and try it out. If you're not a Pro account holder, what are you waiting for? Get yourself upgraded right now! 😉

iOS WebGL Support

· One min read

PlayCanvas on iPhone

Looks like Will was right with his predictions for the Apple announcements at WWDC. Our friends at Ludei have confirmed that WebGL is supported on iOS devices.

This is great news for PlayCanvas users who can now deploy games to every major browser, whether mobile or desktop.

Apple Embraces WebGL

· 2 min read

In July 2011, Apple released Safari 5.1 bringing WebGL to OS X users. WebGL advocates the world over rejoiced - except there was a catch. WebGL was disabled by default, hidden behind a flag buried deep within Safari's preferences panel. The general expectation was that a switch to 'on by default' could not be far behind. Almost 3 years on, it seems this view was seriously misjudged.

But now, it seems things might be about to change due to some exciting developments. Apple has just published the session schedule for WWDC 2014. If you scan the session list, you will find this:

WWDC WebGL Session

So what can we deduce from this (and do excuse the speculation):

  1. Apple would not be running a session on WebGL if it was not supported on its browser platform. Therefore, an update to Safari with WebGL 'on by default' must be imminent.

  2. The bigger question is whether Mobile Safari will also support WebGL. The WWDC app actually has a filter so that you can display sessions relevant to iOS, OS X or both. If you just select iOS, Apple's WebGL session is still displayed. Interesting, I think you will agree. I would also suggest that Apple would not want to enable a feature or API on desktop and not support it on mobile (and vice versa). It is more likely that Apple has delayed enabling WebGL by default on desktop until they considered it ready for general release on mobile.

So, it seems that the final domino is teetering, about to fall. WebGL on Safari is coming. Happy days.

Update

Safari 7.1 should have WebGL enabled by default. See here for a feature comparison against Safari 7.0 - scroll down to the section entitled '3d graphics'.