
WebXR AR Made Easy with PlayCanvas

· One min read
Steven Yau
Partner Relations Manager

We are excited to announce the launch of our WebXR AR Starter Kit, available in the New Project dialog today!

New Project WebXR

WebXR is a technology that powers immersive and interactive AR and VR experiences to be accessed through supported web browsers. This allows us to build memorable, engaging content and share them with just a URL. No installs needed!

The starter kit comes with all you need to kickstart your AR experience for WebXR including:

  • Real world light estimation
  • AR shadow renderer
  • AR object resizing and positioning controls
  • Physics raycasting
  • And more!

Look how quickly you can create AR experiences below!

Pacman Arcade + animation by Daniel Brück is licensed under CC BY 4.0

Try it on your device

Give the Starter Kit a try today at playcanvas.com where you can use it for free!

Draco Mesh Compression Arrives in the PlayCanvas Editor

· 2 min read

We are thrilled to announce the immediate availability of Draco Mesh Compression in the PlayCanvas Editor! Our latest feature allows developers to compress meshes using Google's Draco technology, reducing file sizes and enhancing the end-user experience.

At its core, Draco Mesh Compression reduces the amount of data needed to represent 3D graphics without compromising visual quality. The technology achieves this by applying a lossy compression algorithm to the mesh data. With less data to transfer, the result is faster load times and lower bandwidth costs for your applications.

The open source PlayCanvas Engine has been able to load Draco-compressed glTF 2.0 files for quite some time now. But now you can generate these Draco-compressed glTF files in the Editor at import time. Check out how easy it is to use:

"1972 Datsun 240k GT" by Karol Miklas is licensed under Creative Commons Attribution-ShareAlike.

In the example above, a 49.9MB GLB file is crunched down to only 3.67MB. That's a 92.6% reduction is file size! And for the majority of scenes, you should notice no difference in terms of visual quality. The only cost is decompression time when the compressed GLB is downloaded by an end user, but this should be significantly less than what is saved in terms of download time.

To enable the feature, open your Project Settings in the Inspector, expand the Asset Tasks panel and edit the Mesh Compression setting. Then, simply Re-Import any existing FBX or GLB and compression will be applied. Any FBX or GLB subsequently imported will also respect your mesh compression setting. Read more on the Developer Site.

We believe that mesh compression is going to take many types of applications to the next level, particularly e-commerce applications like product configurators, which need to load detailed meshes as fast as possible.

Get started with PlayCanvas today and make your WebGL dreams a reality!

How to make your HTML5 Games Awesome!

· 12 min read
Associate Partner Support Engineer

How To Make Your HTML5 Games Awesome

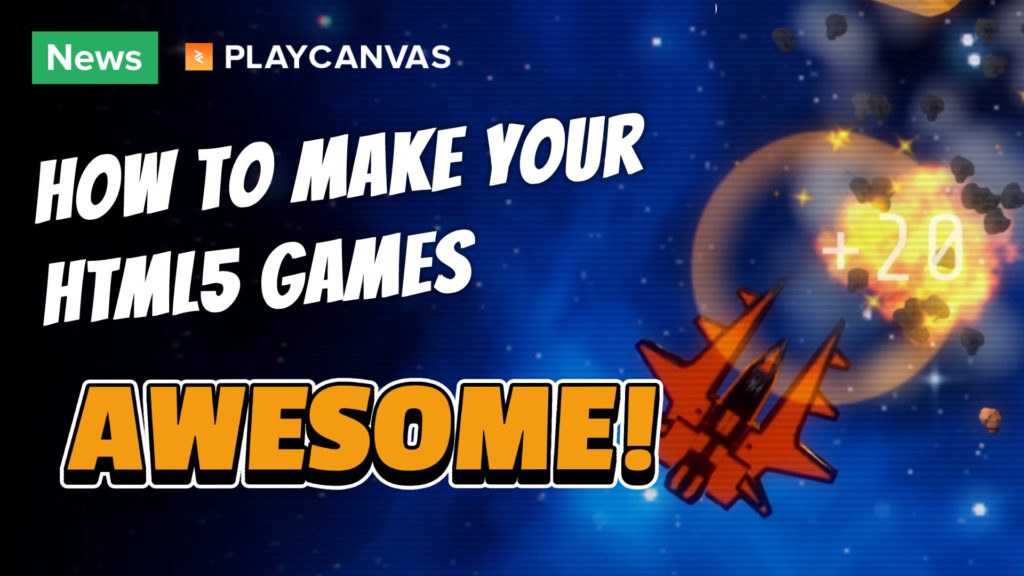
The quality of a video game is often determined by how polished it is. It's the attention to detail and the finishing touches that can make a good game great. In this article, we'll take a look at the importance of polish in game development and how it can significantly enhance the overall experience.

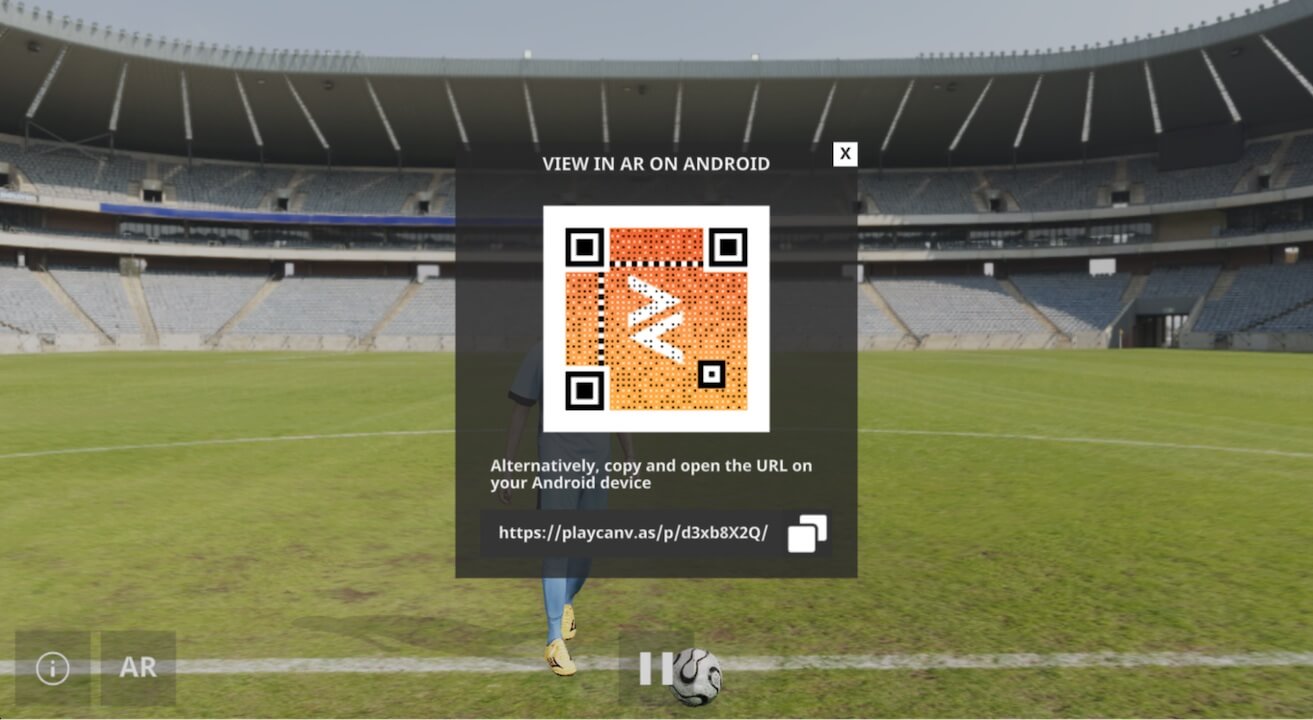
We'll use Space Rocks!, a simple Asteroids game created with the PlayCanvas game engine to showcase how even the smallest details can make a big impact.

Game juice is a design term to refer to the small visual and audio effects that are added to a game to make it feel more satisfying to play. This can include things like screen shakes, particle effects, and sound effects that are triggered when the player takes certain actions. Game juice is all about enhancing the overall feel of a game and making it more immersive and enjoyable.

Particularly, we'll explore how game polish can be achieved through game juice.

Play it here!

How it started

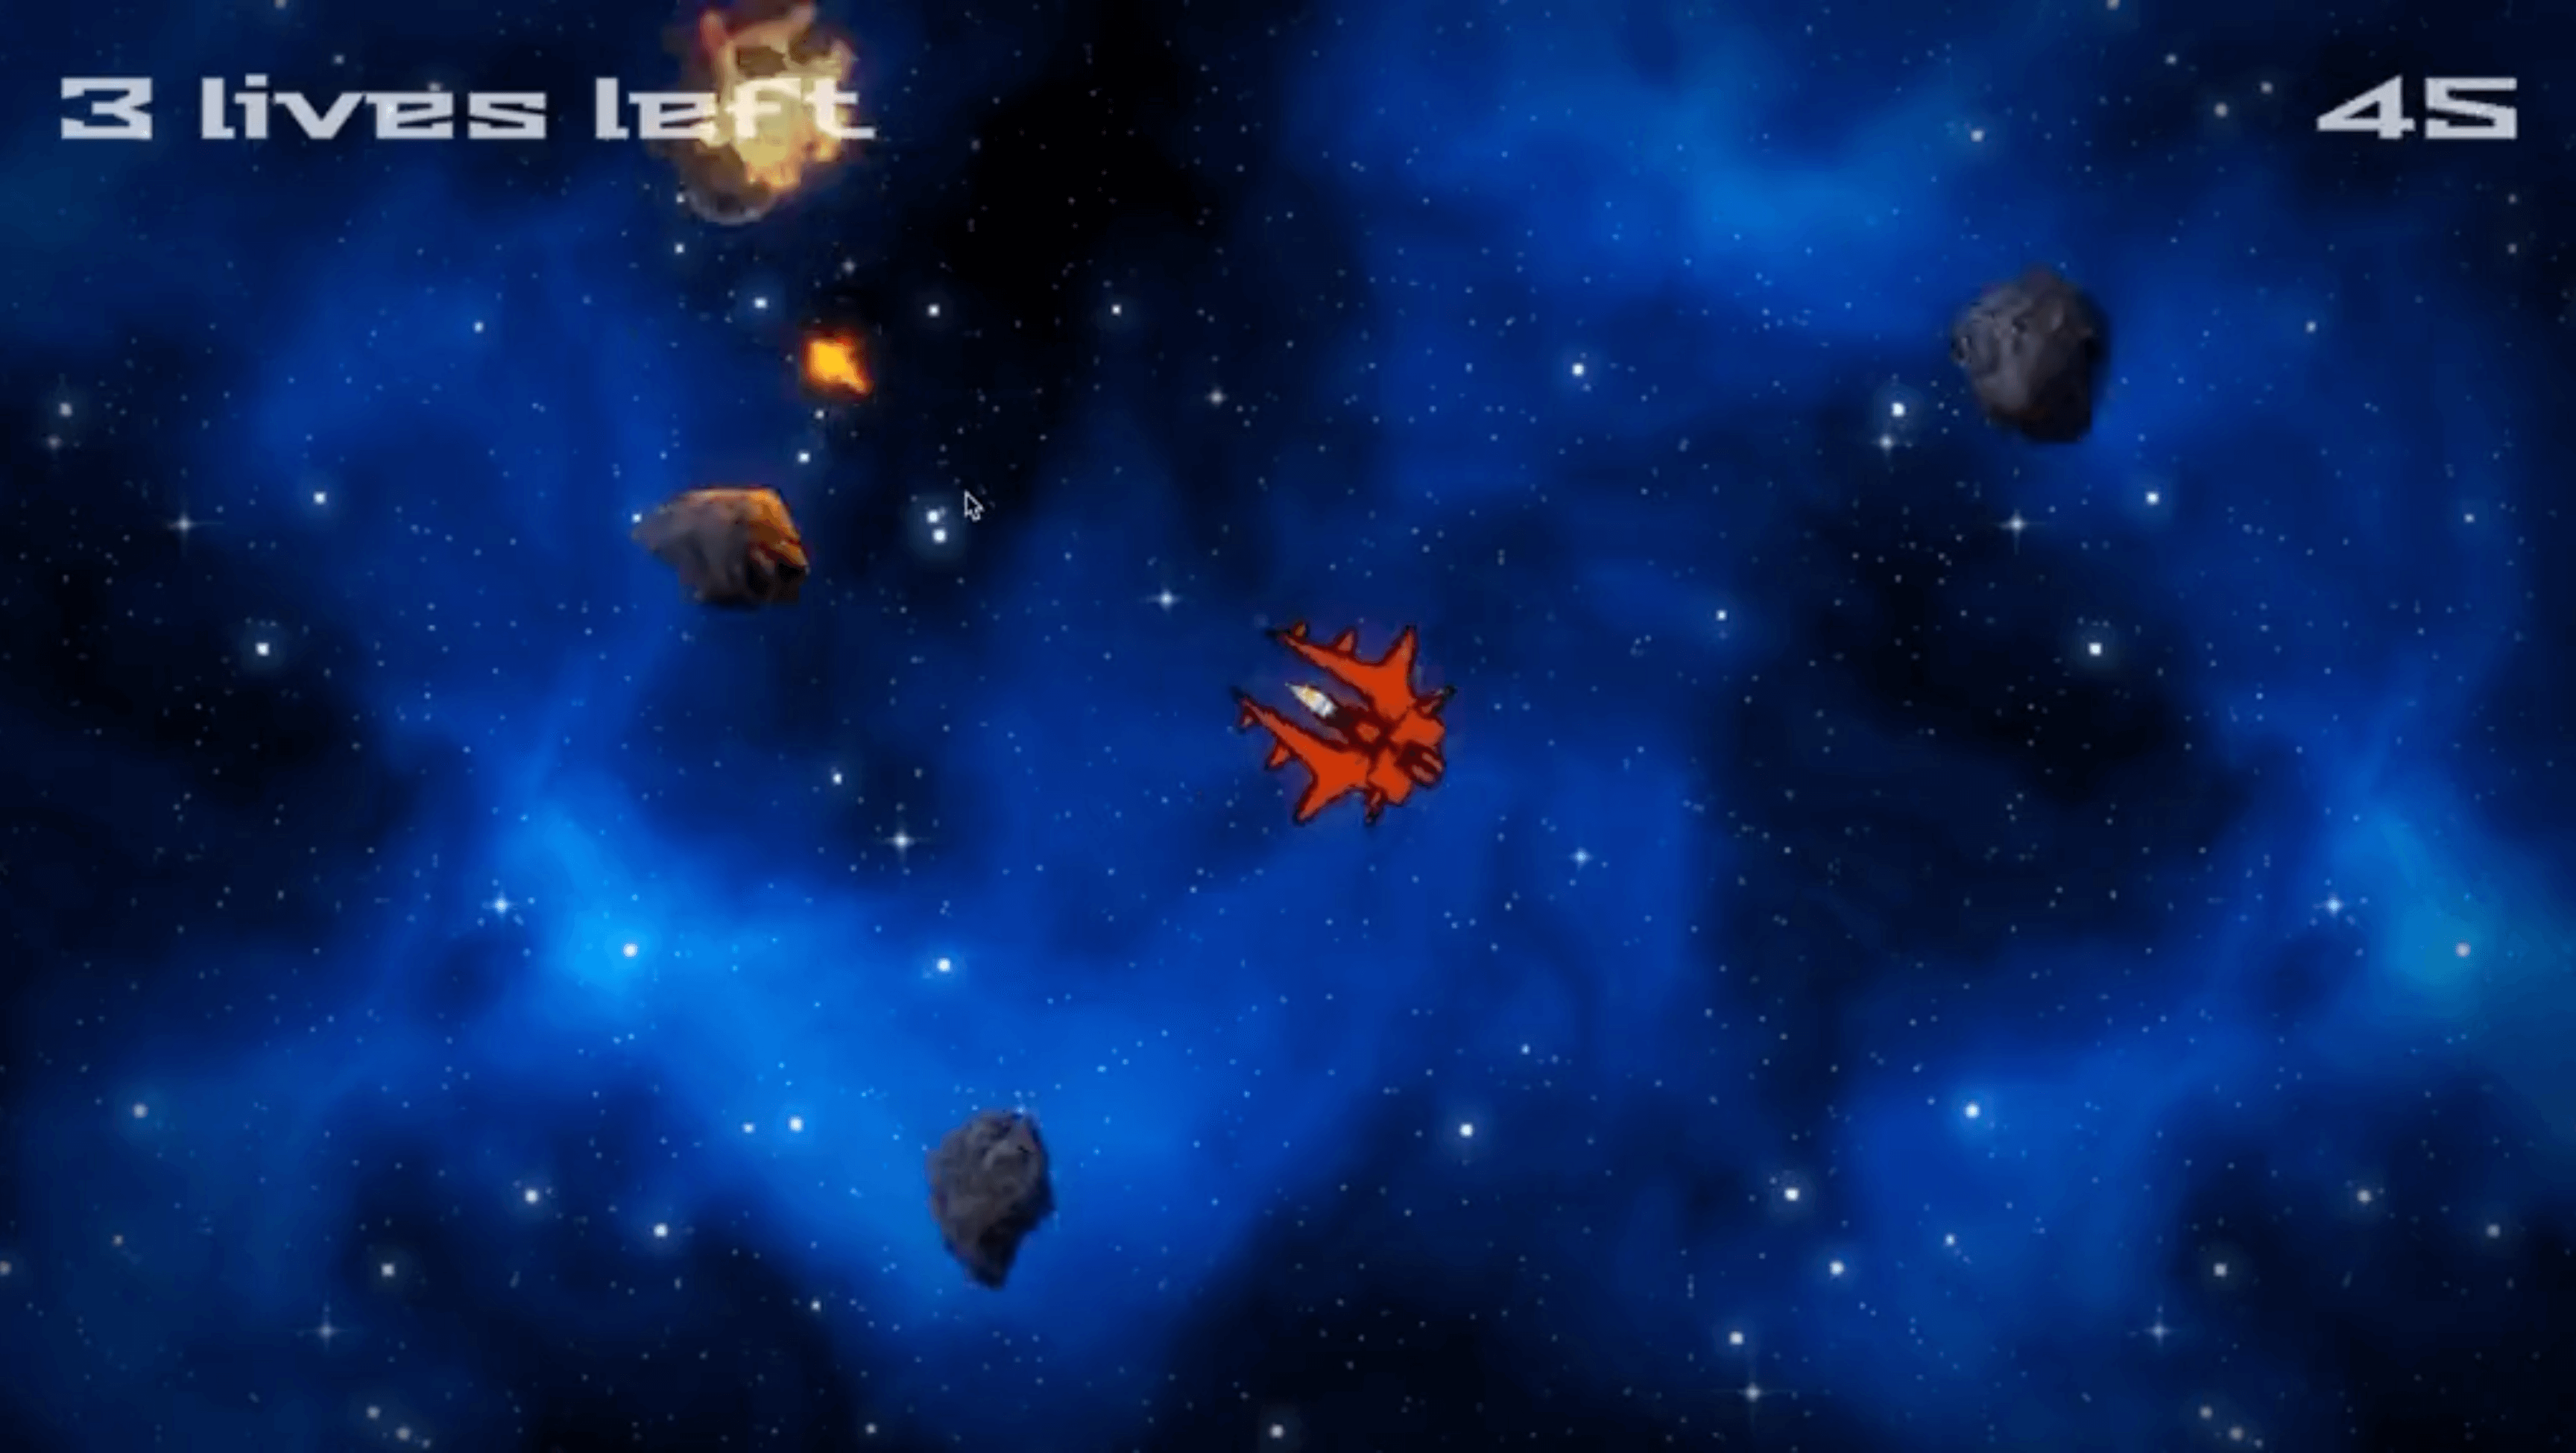
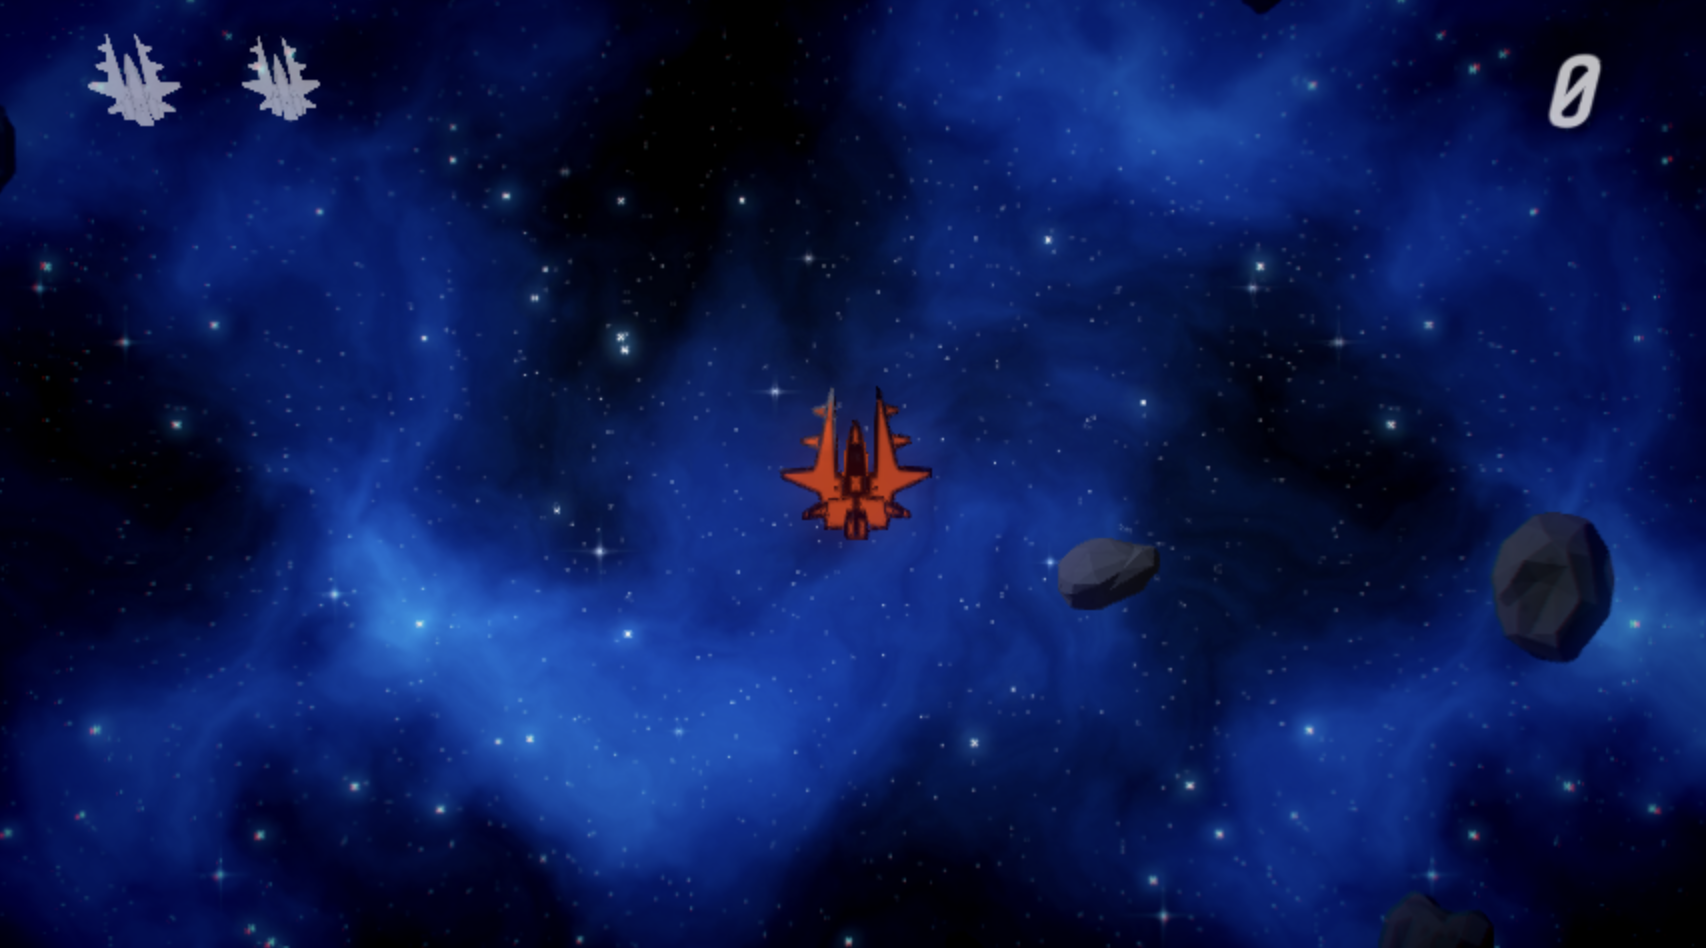
This was our starting point before we added game juice. While the game is fully functional and plays well, it lacks the visual and audio effects that would make it truly engaging. As a result, it feels a bit dull and uninteresting.

However, with the right attention to detail and some careful implementation of game juice, we can transform this basic Asteroids game into something much more exciting and satisfying to play.

What can we improve?

To think about what should have game juice, I always try to narrow down the most common interaction or core mechanic of the game. In our case, that would probably be:

  • Shooting
  • Destroying asteroids
  • Colliding with asteroids

With those three key pieces in mind, let's start thinking about how we can improve them.

For shooting

It's not very interesting right now:

Basic Shooting

If we want to change that, there's a few key things we can do. We can increase the fire rate through a script that allows us to easily control by decreasing the fire cooldown.

Gun.attributes.add('cooldown', {
type: 'number',
default: 0.25,
title: 'Cooldown',
description: 'How long the gun has to wait between firing each bullet'
});

Gun.prototype.update = function (dt) {
this._cooldownTimer -= dt;

if (this.app.mouse.isPressed(pc.MOUSEBUTTON_LEFT) && this.canFire()) {
this.fireBullet();
}
};

In fact, while we're at it, let's make shooting a bit more unpredictable. Let's add some spread to our shots!

Gun.attributes.add('spread', {
type: 'number',
default: 10,
title: 'Bullet Spread',
description: 'Up to how many degrees each bullet should vary in Y rotation.'
});

Gun.prototype.applySpreadOn = function (bullet) {
var rotation = this.entity.getEulerAngles();
rotation.y += getRandomDeviation(this.spread);
bullet.setEulerAngles(rotation);
};

A simple but impactful change! Here's how it looks with values I put in for some fun:

Shooting Spread Effect

I highly encourage you to play with these values to see what's fun for you!

It's getting better, but still not there. Let's think about more visual aspects now. What more can we do to make it more visually appealing?

PlayCanvas has a nice feature that allows you to have tons of lights in your scene with very little performance impact! It's called ✨ Clustered Lighting ✨.

We can actually leverage this amazing tech to give every single one of our bullets a point light - this makes the scene considerably more dynamic as everything gets lit up when we fire!

As another touch, let's add a few sparkles when our shots hit something! The extra visual effect will make a big difference instead of just letting our bullets disappear. Particle explosions are always awesome.

Shooting With Particles

Awesome! Our bullets look pretty nice. But we’re still shooting at fairly dull asteroids. Let's make a few changes.

Destroying Asteroids

Firstly, we want our asteroids to stand out from our background. Let's change the background texture to something a bit brighter.

New Background Texture

Much better! But can we make the asteroids themselves prettier? They're currently mapped with a fairly low resolution texture. Moreover, there's no variety - all asteroids are the same, only rotated differently.

Let's import a new mesh and texture for the asteroids.

New Asteroid Model

Nice! Much more visible, and much more variety - I should note I went ahead and added a simple component that further randomizes the scale of the asteroids being spawned!

var ScaleRandomizer = pc.createScript('scaleRandomizer');

ScaleRandomizer.attributes.add('baseScale', {
type: 'number',
title: 'Base Scale',
description: 'The base scale to deviate from'
});

ScaleRandomizer.attributes.add('scaleDeviation', {
type: 'number',
title: 'Scale Deviation',
description: 'The amount by which the effective scale should deviate from the base scale'
});

// initialize code called once per entity
ScaleRandomizer.prototype.initialize = function () {
this.entity.setLocalScale(this.getRandomScale());
};

ScaleRandomizer.prototype.getRandomScale = function () {
var deviation = getRandomFloatDeviation(this.scaleDeviation, 3);
var randomScale = this.baseScale + deviation;

return new pc.Vec3(randomScale, randomScale, randomScale);
};

Awesome, the asteroids look much nicer. Let's turn our attention back to our background for a moment as it looks very static.

  • Could we give it some life by adding some ‘background’ asteroids?

  • Could we even make destroyed asteroids leave pieces behind as we destroy them?

  • The game currently gets harder as time goes on. Maybe we can indicate that visually somehow? Maybe by changing the background texture?

Let's implement these ideas!

For the background asteroids, I simply reused our asteroid spawner class, but moved the spawn points a bit below.

Spawner Script UI

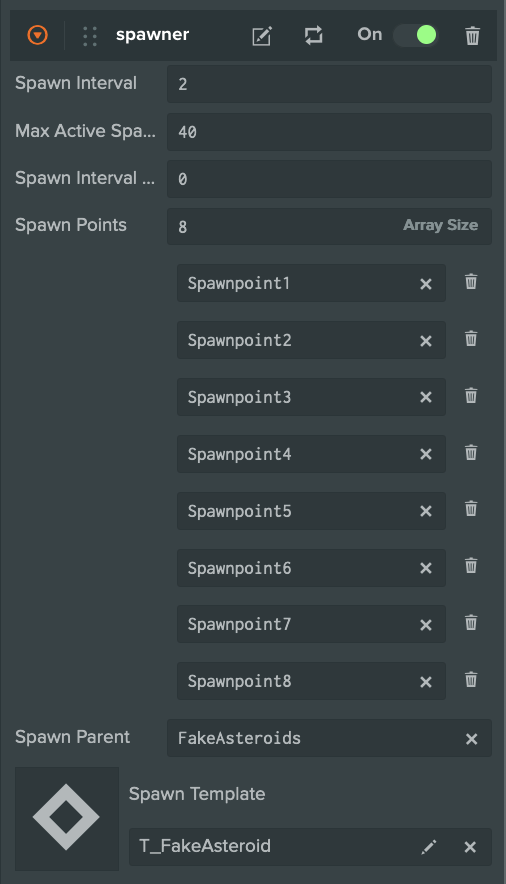
To make it as non-impactful on performance as possible, I duplicated our template, renamed it to FakeAsteroid and removed all components, except the Mover and Rotator components.

This is one of the beauties of using a component-based architecture! It allows you to quickly alter the behavior of objects without having to write or modify code at all!

I also made the FakeAsteroid texture much darker, so as not to distract or confuse the player.

My approach to the ‘fragment’ asteroids was similar, except I made them much smaller, and gave the regular asteroids a component to spawn fragments on death.

FragmentSpawner.attributes.add('minMaxCount', {
type: 'vec2',
title: 'Min, Max Count',
description: 'The minimum and maximum amount of fragments to spawn.'
});

FragmentSpawner.prototype.spawnFragments = function () {
if (FragmentSpawner.fragmentParent === null) {
return;
}

var spawnCount = getRandomInRange(this.minMaxCount.x, this.minMaxCount.y);

for (i = 0; i < spawnCount; i++) {
this.spawnSingleFragment();
}
};

FragmentSpawner.prototype.spawnSingleFragment = function () {
var fragment = this.fragmentTemplate.resource.instantiate();
fragment.reparent(FragmentSpawner.fragmentParent);
var position = this.getFragmentPosition();
fragment.setPosition(position);
};

And, while we’re at it, why don't we add a dust puff and small particles when the asteroid gets destroyed to complement our fragments?

I gathered a few textures online, duplicated our bullet hit particle effects and modified them. To spawn the particle effects, I used the same component I had used in the bullet:

// A script that spawns a particle effect on death
var DeathEffect = pc.createScript('deathEffect');

DeathEffect.attributes.add('particleEffects', {
type: 'asset',
assetType: 'template',
array: true,
title: 'Particle Effect Templates',
});

DeathEffect.effectParent = null;

// initialize code called once per entity
DeathEffect.prototype.initialize = function () {
this.entity.on('destroy', this.onDestroy, this);

if (!DeathEffect.effectParent) {
DeathEffect.effectParent = this.entity.parent;
}
};

DeathEffect.prototype.onDestroy = function () {
for (var i = 0; i < this.particleEffects.length; i++) {
var effect = this.particleEffects[i].resource.instantiate();
effect.setPosition(this.entity.getPosition());
effect.reparent(effectParent);
}
};

And lastly for the background, I added a script to lerp the transparency of our blue space material towards 0. This slowly reveals a purple material underneath.

// A script that manages ambient color.
var AmbientManager = pc.createScript('ambientManager');

AmbientManager.attributes.add('startingColor', {
type: 'rgba',
title: 'Starting Color',
description: 'The starting color for the ambient'
});

AmbientManager.attributes.add('finalColor', {
type: 'rgba',
title: 'Final Color',
description: 'The final color for the ambient'
});

AmbientManager.attributes.add('targetMaterial', {
type: 'asset',
assetType: 'material',
title: 'Target Material',
description: 'The material whose color to set (Matching the ambient color)'
});

// initialize code called once per entity
AmbientManager.prototype.initialize = function () {
this.updateTransition(0);
};

AmbientManager.prototype.updateTransition = function (transitionProgress) {
var color = new pc.Color();
color.lerp(this.startingColor, this.finalColor, transitionProgress);

var mat = this.targetMaterial.resource;
mat.emissive = color;
mat.opacity = color.a;
mat.update();
};

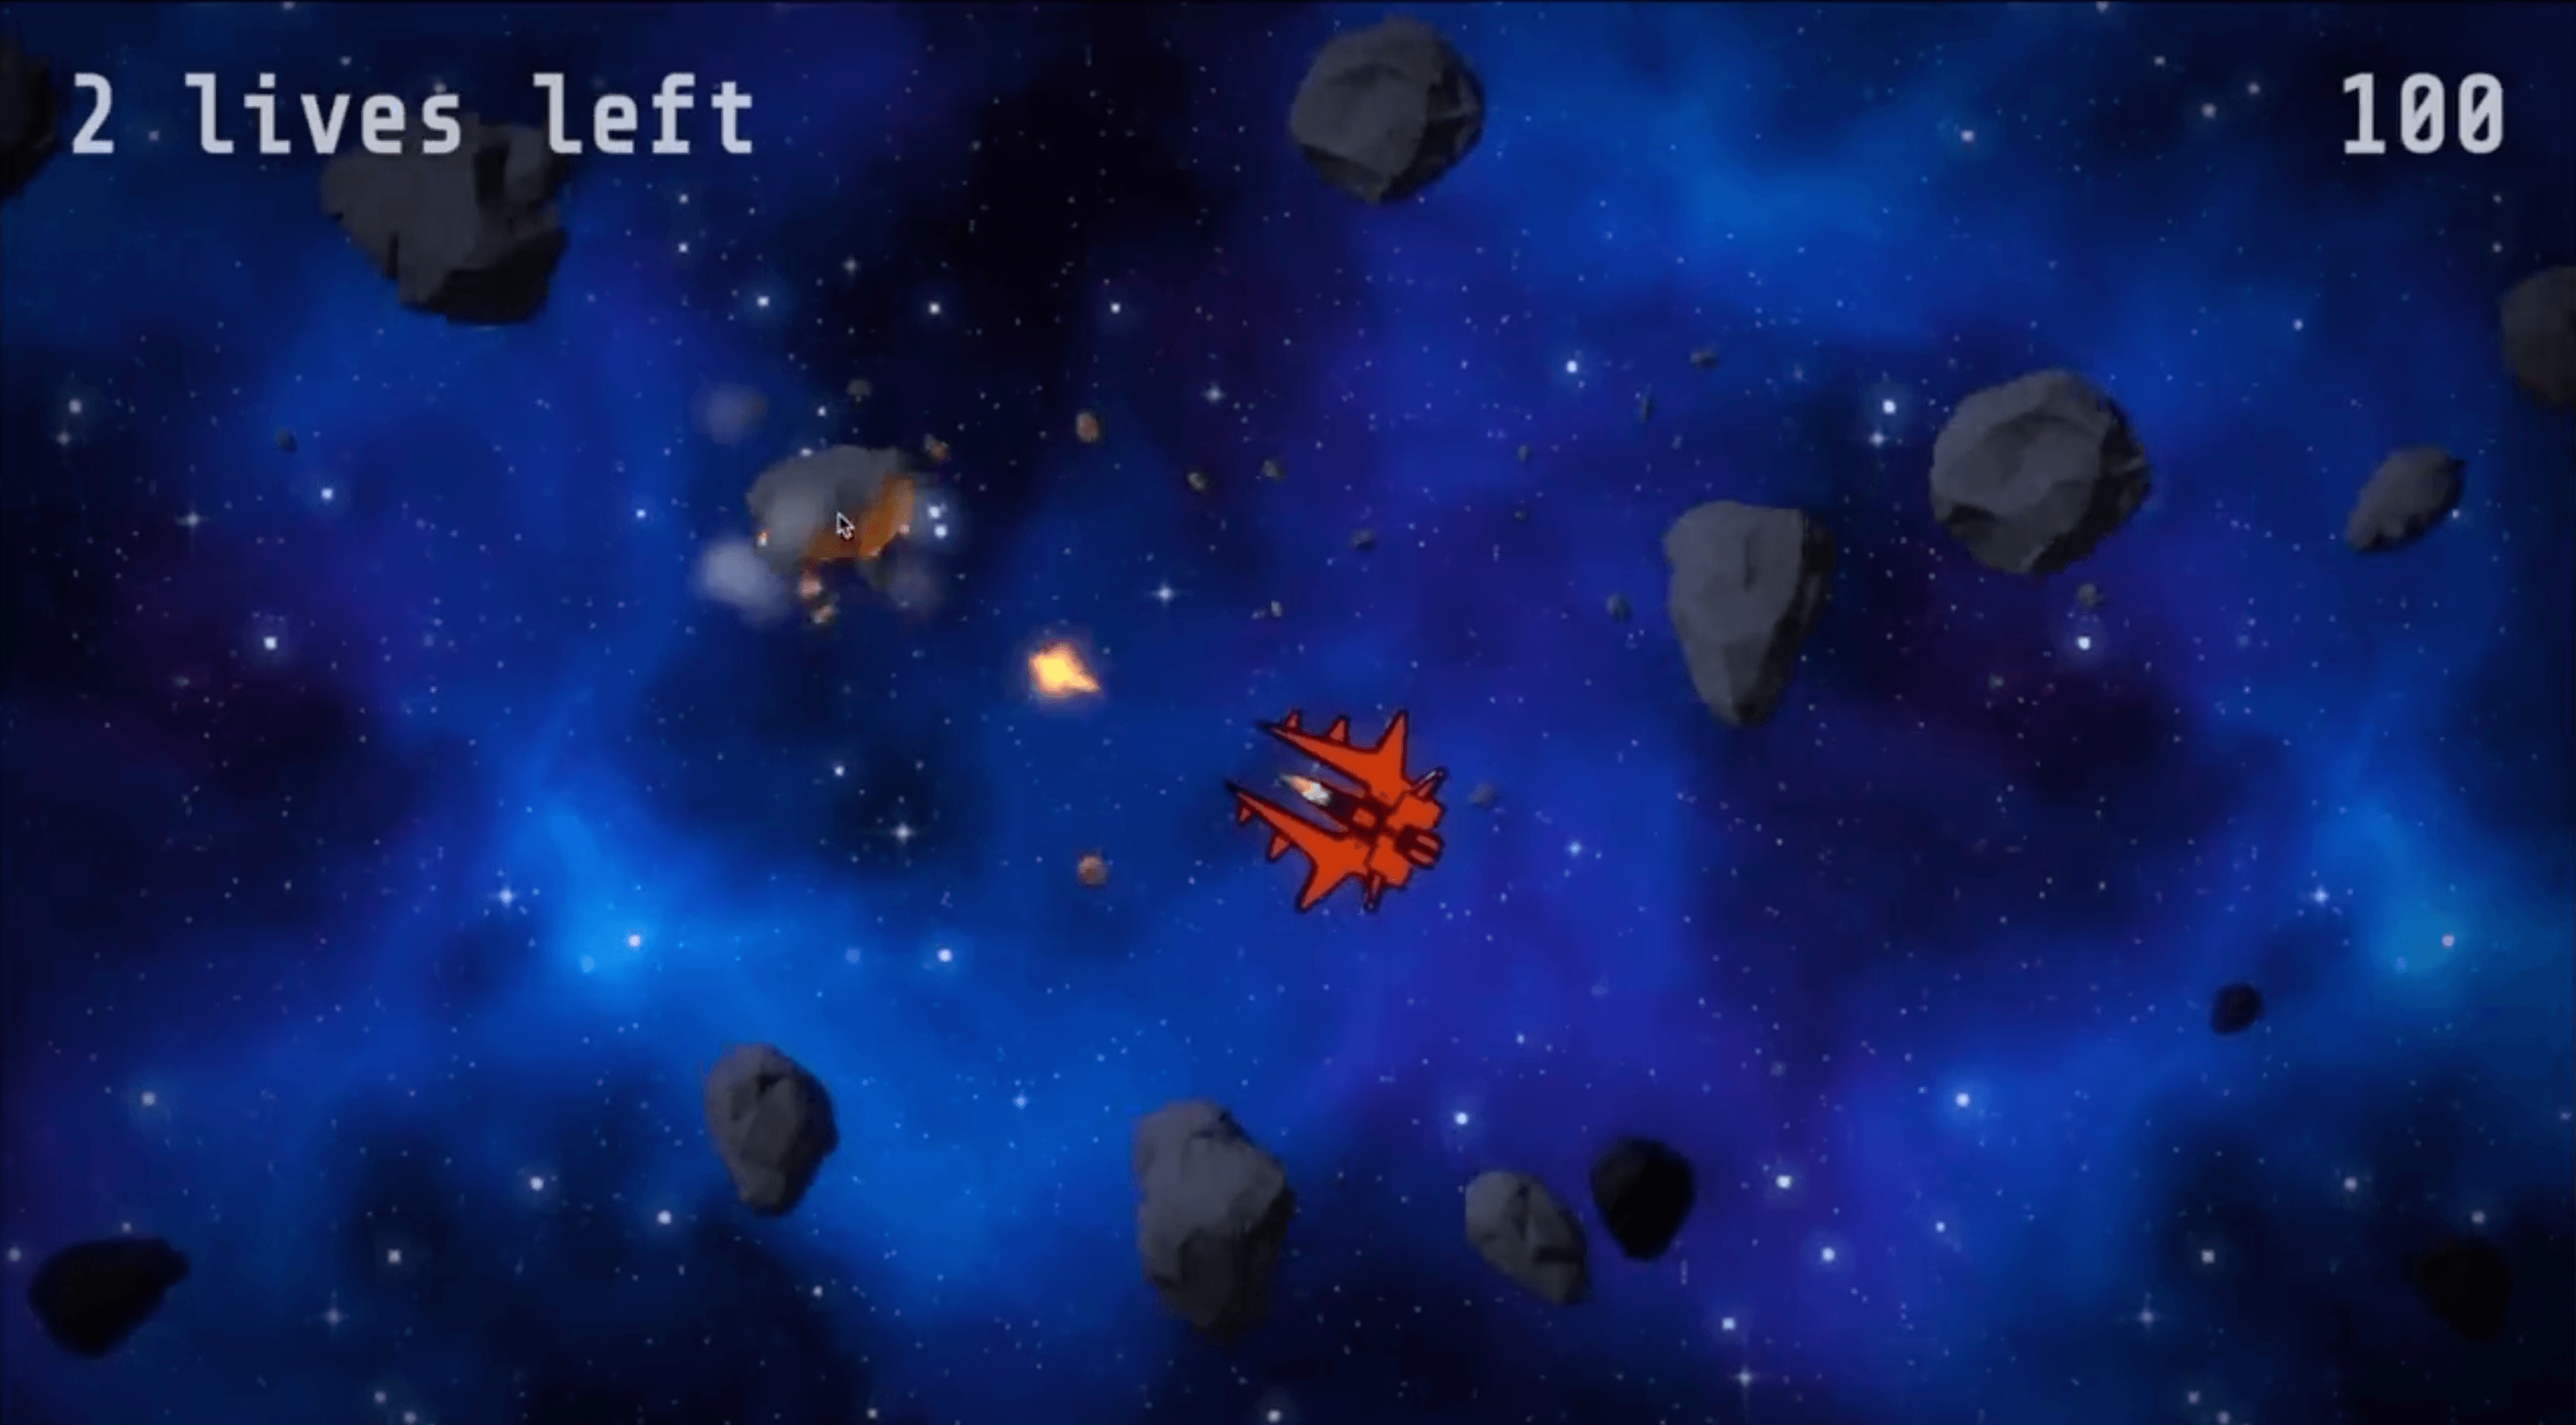
Here's the end result with all of our asteroid changes:

It looks amazingly better! Already a massive difference from our starting point.

Colliding With Asteroids

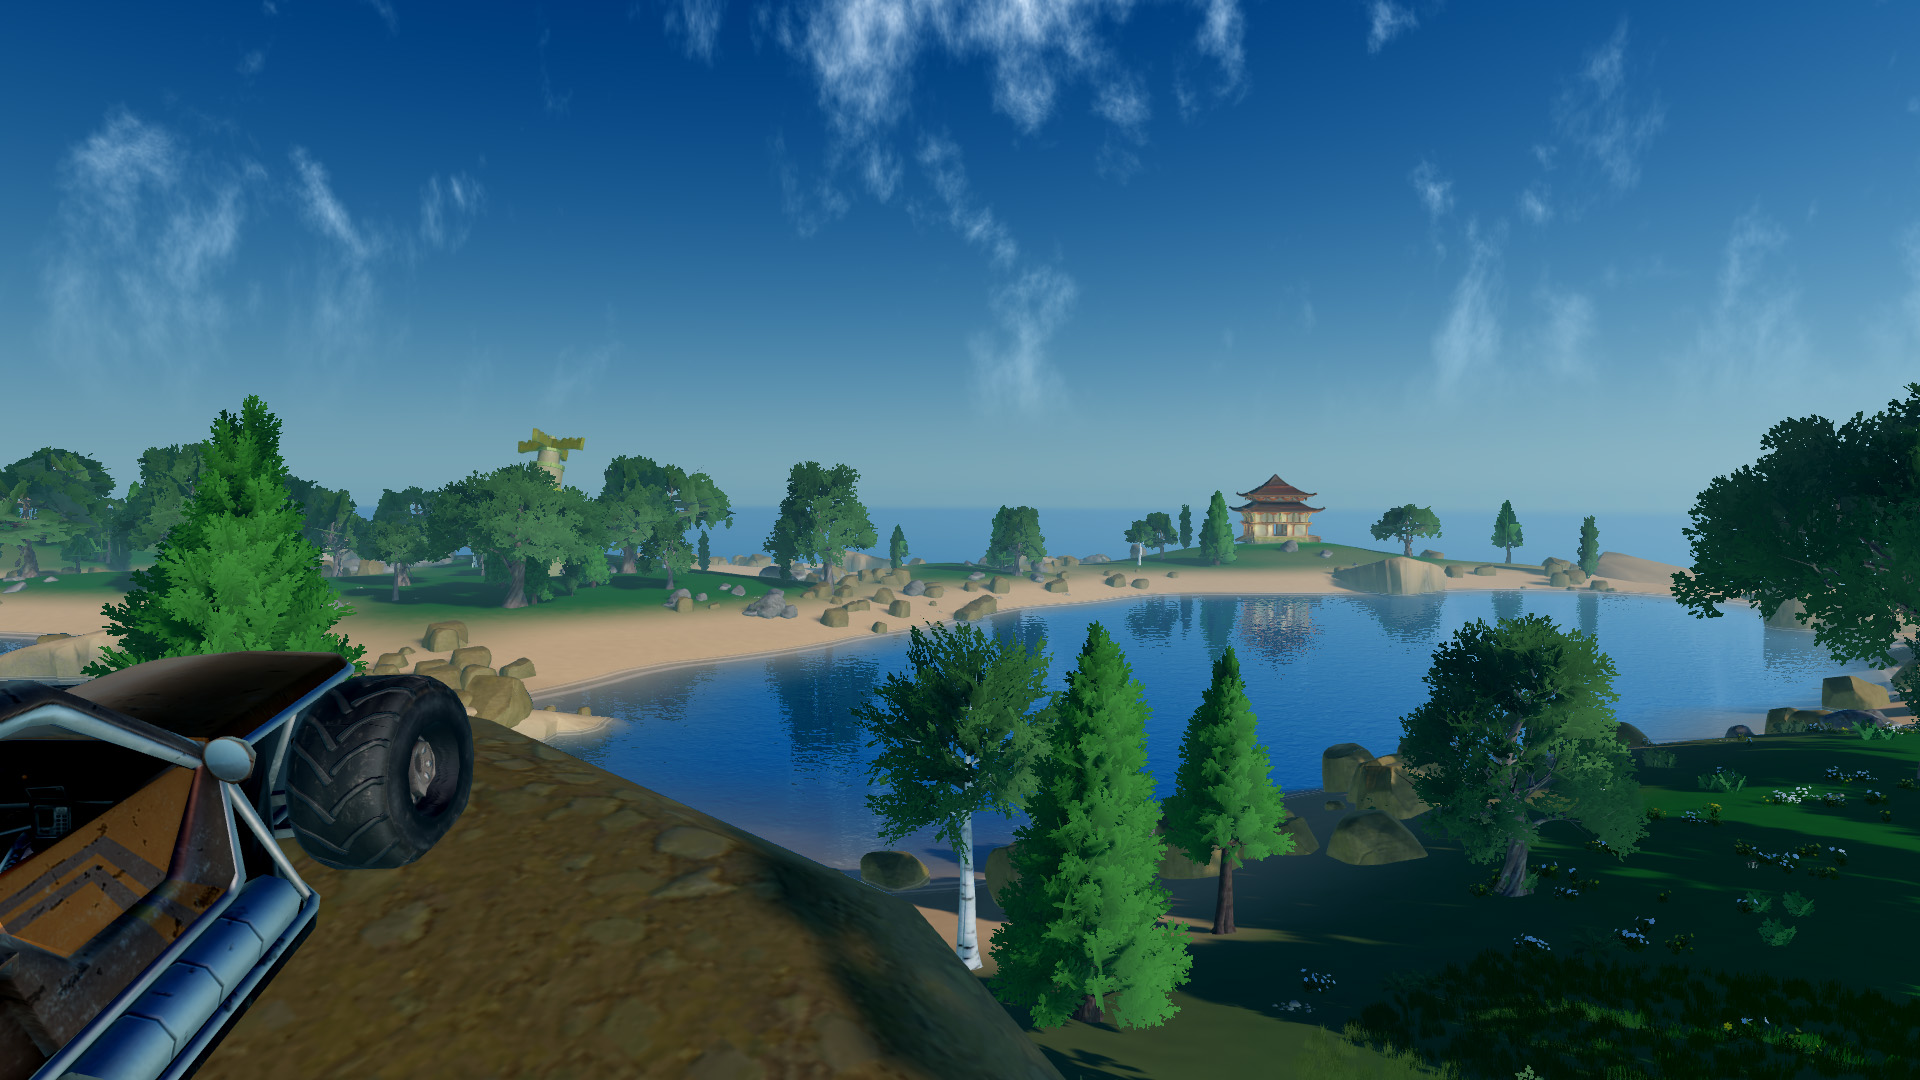
The last piece of the puzzle is when asteroids hit us! It needs to feel impactful! As if you were in a car, and the car just went over a bump.

We'll want to communicate it a bit better. Right now, all that happens is that the ‘n lives left’ counter in the top left gets decremented. Not only does it need to be obvious that we've got hit, but the player must be able to consult how many lives left he has at a glance.

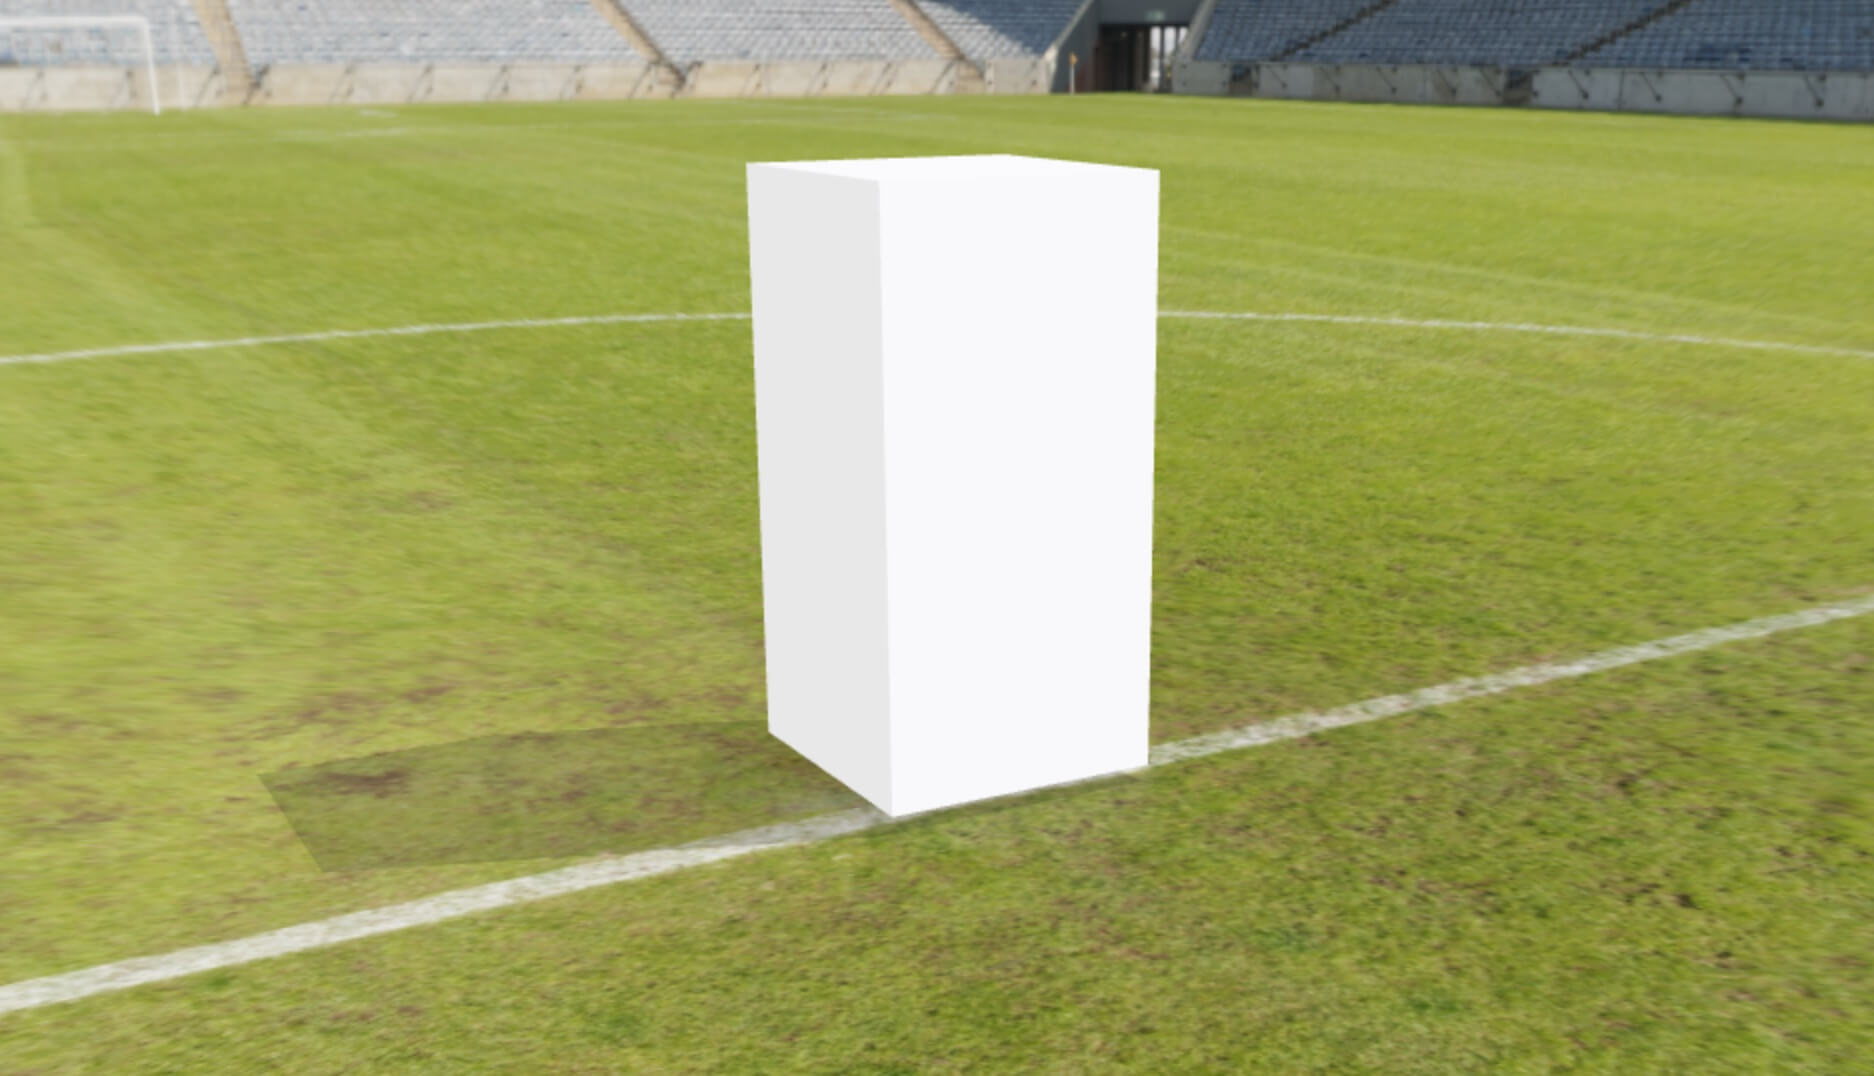
I downloaded the model for our spaceship, and made a top-down render of it in Blender. The result was a simple plain icon:

Spaceship Icon

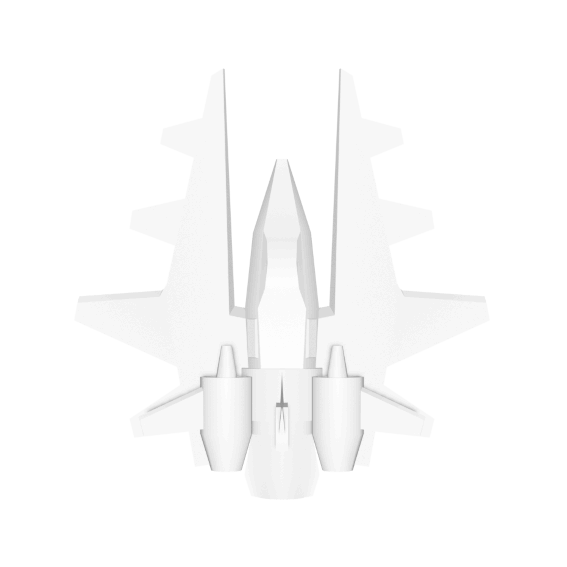
Plain, but enough to make a health counter with. Let's make it semi transparent and add it to the world. Our health counter will display from one to three of these icons to indicate how much life we've got left.

To give it some more juice, let's also make it ‘jump up’ when our health changes, and rotate it inwards towards the game world, to give it a 3D appearance.

And, since using components makes it easy, let's do the same to our score counter:

Score Counter

Much simpler, and much nicer!

Next up, let's try to emulate that ‘bump’ feeling. We can do this by adding some screen shake whenever we get hit! And for extra impact, we can make it slow-mo as well!

Making it slow mo is fairly simple - one component does it:

var BulletTimeEffect = pc.createScript('bulletTimeEffect');

BulletTimeEffect.attributes.add('effectDuration', {
type: 'number',
default: 1,
title: 'Effect Duration',
description: 'How long the bullet time effect should last.'
});

BulletTimeEffect.attributes.add('timeCurve', {
type: 'curve',
title: 'Time Curve',
description: 'How much the time scale should be over unscaled time.'
});

// initialize code called once per entity
BulletTimeEffect.prototype.initialize = function () {
this._time = 0;
this.entity.on('destroy', function () {
this.app.timeScale = 1;
}, this);
};

// update code called every frame
BulletTimeEffect.prototype.update = function (dt) {
this._time += (dt / this.app.timeScale) / this.effectDuration;
this.app.timeScale = this.timeCurve.value(this._time);
this.app.timeScale = Math.min(1, this.app.timeScale);
};

As for making the screen shake, it's a bit more complex (though certainly not magic!). The underlying logic is to simply move the camera randomly. To do so, we can use a script that tracks the camera's original position, and translates it randomly. We reset to the original position at the beginning of each new frame, and repeat.

this.entity.setPosition(originalPosition);
this.entity.translate(this.getRandomTranslation());

The above getRandomTranslation() method could simply return a random Vector3, and it would work. Problem is, though, this approach can make the camera feel like it is jittering, not shaking, particularly if the shake distance is large. This can cause motion sickness.

What else can we do then? Well, there is a more mathematically complex way of getting a random number - one that makes it so that our shaking is smooth, not jittery. This way of getting a random number is Perlin Noise!

Perlin Noise is used to create awesome things all over media, from explosion visual effects to Minecraft's world generation. If you're interested in the math or simply curious, you can learn more in this excellent article.

Let's go with Perlin Noise for our game. You can see the implementation we went with in the perlin-camera-shake.js and perlin-noise.js script.

Lastly, let's add a small shockwave whenever we get hit! Let's use a particle system for this - just like with the asteroid explosion and bullet hit effects. I grabbed a simple circular texture, coloured it red to indicate something negative, and added a script that spawns the effect whenever the player gets hit.

The combined effects look like this:

You'll notice I've added screen shake to more than just the player getting hit! I'm a big fan of this effect, so I've added it to asteroid explosions and firing bullets as well!

And that about does it

With the effects we added above, the game looks and plays entirely different. Destroying asteroids feels good, and everything else in the game is there to enhance that experience.

Finished Game

As a last finishing touch, I went ahead and added a few post-processing effects that PlayCanvas offers. Namely, Vignette, Bloom and Chromatic Aberration. I also added CRT Scanlines as an overlay for a retro effect.

I hope this guide has been useful to you! Take a look at the project, it is public and is accessible as a Game Demo in our documentation.

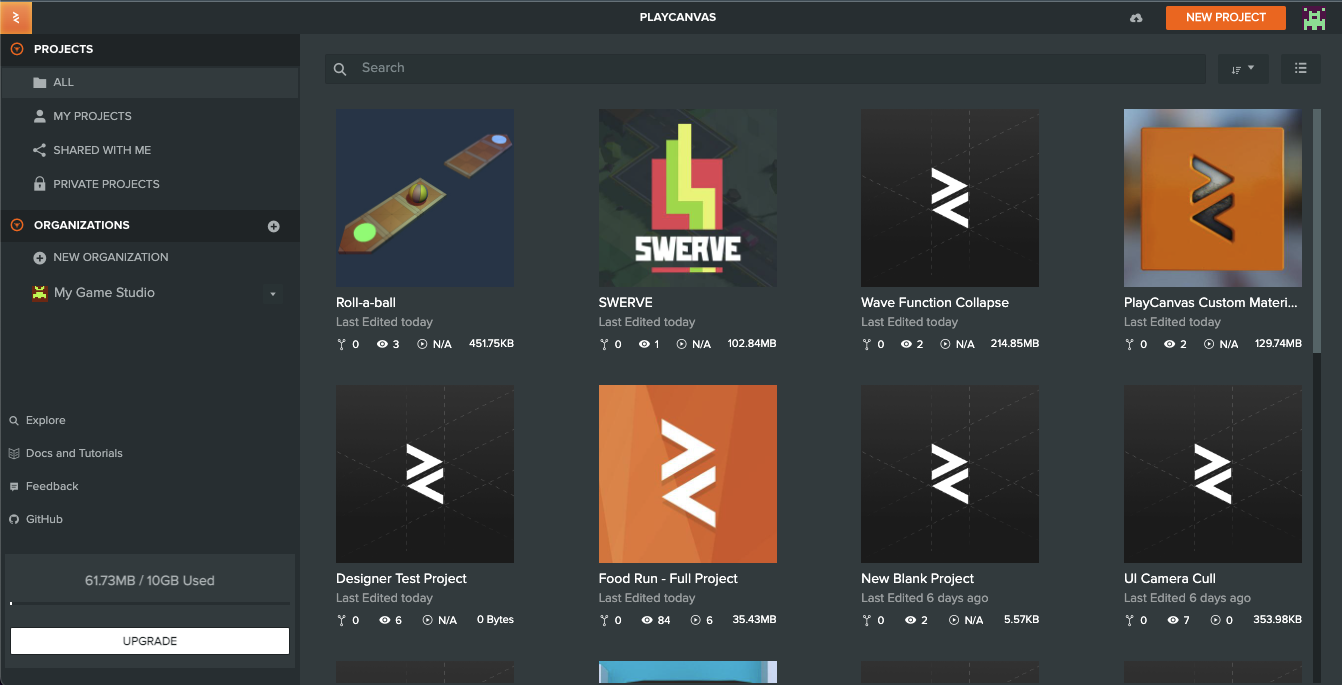
PlayCanvas is an excellent cloud-based game engine that allows you to build games for the browser. It has an amazing editor that allows you to use it as if it were Unity or Unreal - which most developers are accustomed to.

Want to learn more?

Here's a few resources if you want to try and make something similar to juice up your game!

PlayCanvas is an awesome web-first game engine that runs on the cloud. You don't need to download anything, and it's free!

PlayCanvas - The Web-First Game Engine

This one reddit post sums up many tricks you can do in about 60 seconds!

Juice your game in 60 seconds

There's this very nice GDC talk that goes into game juice a bit more deeply. Tons of useful information there!

Juice it or lose it - a talk by Martin Jonasson & Petri Purho

And there's this awesome INDIGO class that goes in-depth about my favorite game juice - screen shake!

Vlambeer - The art of screenshake by Jan Willem Nijman

PlayCanvas now supports Microsoft volumetric video playback

· 10 min read
Steven Yau
Partner Relations Manager

Open in new tab

We are very excited to release our showcase demo for Microsoft Mixed Reality Capture Studios (MRCS) volumetric video technology.

PlayCanvas now supports MRCS volumetric video with a playback library for captured footage at their studios. Watch it on desktop, mobile with AR or even in a WebXR-enabled VR headset, all from a single URL!

The library can be easily added to any PlayCanvas project and used to create fantastic immersive mixed reality experiences.

About Microsoft Mixed Reality Capture Studios

MRCS records holographic video - dynamic holograms of people and performances. Your audiences can interact with your holograms in augmented reality, virtual reality and on 2D screens.

They are experts at capturing holographic video, advancing capture technology and have been pioneering its applications since 2010.

Learn more about Microsoft Mixed Reality Capture Studios here.

How was this created?

The demo was created with a combination of several tutorials and kits available on the PlayCanvas Developer Site, the MRCS playback library and freely available online assets.

You can find the public project for the demo here. We've removed the URL to the volumetric video file (due to distribution rights) and the proprietary MRCS devkit library. Please contact MRCS to gain access to the library and example videos.

Microsoft Video Playback Library

In the folder 'holo video', you will find the scripts and assets needed for playing back volumetric video. You will need to add the devkit library file name 'holo-video-object-umd.js' that will be provided from MRCS to complete the integration and be able to playback video.

Holo Video In Assets Panel

Due to the size and how the data files for the video need to be arranged, they have to be hosted on a separate web server (ideally behind a CDN service like Microsoft Azure).

The 'holo-video-player.js' script can be added to any Entity and be given a URL to the .hcap file. At runtime, the script will create the necessary meshes, materials, etc to render and playback the volumetric video.

Holo Video Script UI

Expect full documentation to be released soon on our site!

Creating a Multi Platform AR and VR experience

As you see in the video, we've made the experience available to view in the standard browser, AR on WebXR-enabled mobile devices (Android) and VR on devices like the Oculus Quest. iOS support for WebXR is in progress by the WebKit team.

This was done by combining several of our WebXR example projects and the scripts and assets can be found in the 'webxr' folder:

WebXR Folder In Assets Panel

'xr-manger.js' is controls how the XR experience is managed and handled throughout the experience:

  • Entering and leaving AR and VR.

  • Which UI buttons to show based on the XR capabilities of the device it is running on (e.g hides the VR UI button if AR is available or VR is not available).

  • Showing and hiding Entities that are specific to each experience.

  • Moving specific Entities in front of the user when in AR so the video can be seen more easily without moving.

Adding AR

AR mode was added first, taking the 'xr-manager.js' script as a base from WebXR UI Interaction tutorial. Key changes that had to be made to the project were:

  • Ensuring ‘Transparent Canvas’ is enabled in the project rendering settings.

  • Creating a second camera specifically for AR which is set to render the layers that are needed for AR (i.e. not including the skybox layer) and having a transparent clear color for video passthrough).

After copying and pasting 'the xr-manager.js' file from the tutorial project into the demo project, I hooked up the UI elements and buttons to enter AR and added extra functionality to disable and enable Entities for AR and non-AR experiences.

This was handled by adding tags to those Entities that the manager finds and disables/enables when the user starts and exits the XR experiences.

For example, I only want the AR playback controls entity to be available in AR so the tag 'ar' was added to it.

Entity Tagged With AR

There is also an additional tag 'ar-relative' that is used for entities that need to move in front of the user when the floor is found in AR. It provides a much better experience for the user as they don't have to move or look around to find the content.

When the user leaves the AR session, the Entities are moved back to their original position that were saved when they entered.

Adding VR

This was a little trickier than expected as we didn't have a complete example of the needed functionality and it also had to work with the existing AR functionality.

The goal was for the user to be able to move around holo video and also show the controllers that matched the VR input devices being used.

Our Starter Kit: VR has the scripts and functionality to interact with objects, teleport and move around an environment. We can tag entities in the scene with 'pickable' for the VR object picker logic in object-picker.js to test against when the VR input device moves or the select button is pressed.

Pickable And Teleportable Tags

Whether it is an object that we can teleport to or interact with is dependent on the other tags on the Entity.

In this case, the aim was to be able to teleport around the video so an Entity with a box render mesh was added to represent the area and 'pickable' and 'teleportable' tags were added too.

Next up was handling how the controllers should look in VR. The starter kit uses cubes to represent the controllers as they are meant to be replaced with something else by the developer.

VR Controllers

In my case, I wanted to use skinned hands or the representations of the VR controllers instead. Max (who built the PlayCanvas WebXR integration) created a project that does just that: WebXR Controller/Hand Models. And it was just a matter of merging the code and assets together.

WebXR Hand Tracking

Projected skybox

The skybox was obtained from Poly Haven and converted to a cube map with our texture tool. Donovan wrote a shader that projected the cubemap so there was a flat floor that the user could move around in.

It's a nice and easy effect that can be applied in similar scenes without having to build a model or geometry. See the scene without the effect applied (left) and with it (right):

Infinite SkyboxGround Projected Skybox

The shader code is applied by overriding the global engine chunk in projected-skybox-patch.js on application startup.

World Space UI in VR

In VR, there's no concept of 'screen space' for user interfaces so the playback/exit controls would need to be added somewhere in the world.

It was decided the controls should be placed near the holo-video and would always face the user as, generally, that is where their focus would be.

VR UI

This was done by simply having UI buttons in world space as offset child Entities of a 'pivot' Entity. The pivot Entity is positioned at the feet of the holo-video and can be rotated to face the VR camera.

This was done by simply having UI buttons in world space as offset child Entities of a 'pivot' Entity. The pivot Entity is positioned at the feet of the holo-video and can be rotated to face the VR camera.

Setting Up UI In Editor

There's a script on the pivot Entity that gets a copy of the VR camera position and sets the Y value to be the same as the pivot Entity's. It then uses that position to look at so that the UI controls always stay parallel to the floor.

The other common place to have UI controls would be somewhere relative to a tracked controller such as on the left hand/controller. I decided against this because it's not always guaranteed that the VR device would have two hands/controllers such as Google Cardboard.

As the 'floor' is just a projected skybox, a solution was needed to render the shadows of the holo-video onto the scene.

Shadow 'catcher' material

Gustav provided a material shader that would sample the shadow map and make any area that doesn't have a shadow fully transparent.

To make this a bit easier to see, I've shown where the plane would be positioned below. Anywhere where it's white on the floor plane would be fully transparent as there is no shadow being cast there.

Shadow Receiver QuadFinal Shadow Effect

Other tutorials used

There is other functionality in the experience that has been taken from our tutorial/demo project section that have been slightly modified for this project.

These include:

  • Orbit Camera for the non XR camera controls. The orbit camera controls are disabled when the camera entity is disabled so that the camera wouldn't move while in a XR session.

  • Video Textures for the Microsoft video on the information dialog. It was modified so that it would apply the video texture directly to the Element on the Entity it was attached to.

Although not PlayCanvas related, it is worth shouting out: the awesome QR code (that is displayed if the device is not XR compatible) is generated with Amazing-QR. It's able to create colorful and animated QR codes that are more interesting and attractive than the typical black and white versions.

QR Code

Issues found

There were a couple of issues found while this project was being developed. We will be searching for solutions in the near future. For now, we've worked around them in a couple of ways.

In VR, clustered lighting with shadows enabled causes a significant framerate drop. As the shadows in the project are from the directional light and they are processed outside the clustered lighting system, clustered lighting shadows can be disabled with no visual change.

The demo uses screen space UI in AR and there's an issue with accuracy of UI touch/mouse events when trying to press UI buttons. This is because, when the user enters AR, the engine uses a projection matrix that matches the device camera so that objects are rendered correctly relative to the real world.

Unfortunately, the screen-to-world projections are using the projection matrix directly and instead, using the FOV properties on the camera component. The mismatch is what is causing the inaccuracy.

My workaround is to calculate the relevant camera values from the projection matrix on the first AR render frame and apply that back to the camera component. The code can be seen here in xr-manager.js.

Wrapping up

If you have reached here, thank you very much for reading and we hope you have found some useful takeaways that you can use in your own projects!

Useful links:

We would love to get your thoughts and feedback so come join the conversation on the PlayCanvas forum!

glTF 2.0 Import Arrives in the PlayCanvas Editor

· 4 min read

We are excited to announce a major update for the PlayCanvas Editor: glTF 2.0 import. This new feature allows users to easily import and use 3D models created in other applications such as Blender and SketchUp, as well as from digital asset stores like Sketchfab, directly into the PlayCanvas Editor.

Model by Loïc Norgeot and mosquito scan by Geoffrey Marchal for Sketchfab licensed under CC BY 4.0
Author: Sketchfab License: CC-BY-4.0 Source: Mosquito in Amber

glTF (GL Transmission Format) is a file format developed by The Khronos Group for 3D models that is quickly becoming the industry standard. It is an open format that is designed to be efficient and easy to use, making it the perfect choice for use in the PlayCanvas Editor.

The PlayCanvas Editor and run-time now supports the full glTF 2.0 specification, including 100% of ratified glTF extensions (such as sheen, transmission, volume and iridescence). This means that developers can import and use high-quality 3D models and take advantage of the latest advancements in the glTF format to create truly stunning interactive experiences.

One of the major benefits of glTF import is the ability for users to edit glTF materials in the PlayCanvas Editor's powerful Material Inspector. Here you can see the famous Stanford Dragon imported from GLB with refraction properties edited live in the Inspector:

The dragon model based on the one from Morgan McGuire's Computer Graphics Archive. Original dragon mesh data based on a Stanford Scan © 1996 Stanford University.

Once a glTF model is imported into the editor, all of its materials are available to be tweaked and customized. This added flexibility and control will greatly enhance the workflow of developers and allow them to tweak the appearance of assets without having to fire up Blender.

Another great benefit of the new glTF import feature is its integration with PlayCanvas' Template system. The PlayCanvas Template system allows developers to create reusable and modular components that can be trivially reused across multiple scenes. With the integration of glTF import, developers can now import their 3D models and scenes, and then directly edit the hierarchy, attaching scripts and other component types to the imported scene nodes. This will allow them to create complex and interactive 3D scenes quickly and easily, with minimal coding.

Additionally, the glTF import feature is also integrated with PlayCanvas' animation system. The PlayCanvas animation system allows developers to create and control animations on their entities and characters. When importing animated glTF/GLB, developers can now quickly set up an Animation State Graph to build simple loops or complex transitions. This will allow them to create more dynamic and interactive 3D scenes, with minimal effort. Check out how it can be done in just a few seconds:

CC0: Low poly fox by PixelMannen CC-BY 4.0: Rigging and animation by @tomkranis on Sketchfa.
glTF conversion by @AsoboStudio and @scurest

In short, glTF import is a major addition to the PlayCanvas Editor, and will greatly enhance the workflow of our users. It allows developers to:

  • Faithfully import glTF/GLB files from many different applications and stores.

  • Edit the materials and hierarchy of imported glTF/GLB files.

  • Import glTF/GLB animations and quickly configure loops and transitions.

We are thrilled to bring this new feature to our users and we can't wait to see the amazing projects that will be created with it. If you have any questions or feedback, please let us know on our community forum.

Thank you for choosing PlayCanvas, and happy creating!

PlayCanvas Review of 2022

· 6 min read
Steven Yau
Partner Relations Manager

Happy New Year to you all!

As we begin 2023, let’s take a moment to look back at last year’s highlights for PlayCanvas, the powerful WebGL engine and platform for creating interactive web content.

From new features and improvements to exciting projects and partnerships, PlayCanvas has had a busy and successful year. In this review, we will cover some of the key developments and achievements of the platform, and how they have helped to advance the capabilities and potential of WebGL-based content creation.

The fantastic work done by you

One of the most exciting aspects of PlayCanvas is seeing the amazing projects and work created by you!

From games and interactive experiences to architectural visualizations and simulations, the PlayCanvas community is constantly pushing the boundaries of what is possible with WebGL.

To celebrate this work, we've created a showcase video with the standout projects and work from 2022.

PlayCanvas Showcase 2022

We are looking to do more of these in 2023 so don't be shy! Share with us and the rest of the community on Twitter, forums and Discord.

We also wanted to take a deeper dive into the creative process and workflows behind these projects.

To do this, we reached out to a selection of developers who have used PlayCanvas to create fantastic content across e-commerce, WebAR, games and the metaverse.

In these Developer Spotlights, developers share their experience with PlayCanvas, the challenges and solutions they encountered during development, and the unique insights and approaches they brought to their projects.

These interviews provide valuable insights and inspiration for other PlayCanvas users and anyone interested in WebGL-based content creation.

Graphics Engine Enhancements

This year, we've been laser-focused on adding WebGPU support and glTF 2.0 spec compliance to the PlayCanvas graphics engine, and we're thrilled with the progress we've made.

With Google Chrome set to enable WebGPU by default in 2023, we're excited to be at the forefront of the future of interactive 3D content on the web, and we can't wait to see what WebGPU will allow developers to create.

WebGPU Grabpass
WebGPU Grabpass
WebGPU Clustered Lighting

In addition to WebGPU support, we've also added support for all ratified glTF 2.0 extensions to the PlayCanvas engine, complete with Editor support for iridescence and dynamic refraction. These features allow developers to create even more realistic and visually stunning 3D content.

glTF Asset Viewer

But we didn't stop there! We also released Editor support for Clustered Lighting and Area Lights, which allow developers to easily incorporate hundreds of dynamic lights into their projects. And as it turns out, our users have already been using these new features to add extra flair and fidelity to their projects.

Space Rocks
Space Rocks
Pool Demo
Pirron Pool

glTF Viewer 2.0 with AR support

We released a major update to the Model Viewer, taking it to version 2.0! This update not only improved the user experience, but also added a host of new features.

The most notable new feature is AR support with WebXR (Android) and USDZ export (iOS). This allows users to view glTF models in AR directly from the browser.

glTF Viewer AR on iOSglTF Viewer AR on Android

We've also made the UI more streamlined and mobile-friendly, grouping related functionality together for easier use. Rendering has been improved with the 'High Quality Rendering' option, which enables supersampling to smooth out jagged edges along polygons and high resolution reflections for more realistic rendering.

glTF Viwer Lamborghini Urus

Tools Updates

We've been continuously improving the Editor, making it even more powerful and user-friendly for our developers.

These include:

  • Infrastructure upgrades across the board with benefits to all users including:

    • Faster download speeds for published build zips across the world.

    • Faster asset delivery with up to 50% improvement in loading projects in the Editor and the Launch Tab.

    • Zero downtime deployment for services.

  • More powerful Scene Hierarchy Search that searches components and script names.

  • Creating Texture Tool to inspect textures and convert HDRIs to/from cubemaps (also open source!).

  • Adding GitHub sign-in.

The project dashboard has gotten a huge refresh and can be accessed in-Editor. It includes searching and sorting of the project list as well as being able to manage teams and settings without leaving the Editor!

Project Dashboard

Version Control also got some major features this year, including the addition of the Item History and Graph View, which make it easier to track changes to your projects. And looking ahead to this year, we're planning to make some of our REST API public, so developers can automate flows for CI and tools.

Version Control History

Thank You

As we wrap up our 2022 review of PlayCanvas, we want to take a moment to thank all of our users for their continued support and for the amazing projects and work they have created with PlayCanvas.

Your creativity and innovation inspire us to continue improving and expanding the capabilities of our WebGL engine and platform.

We can't wait to see what the new year brings and the incredible projects and work that our users will create with PlayCanvas. Whether you are new to PlayCanvas or a seasoned pro, we hope that you will continue to be a part of our community and push the boundaries of what is possible with WebGL-based content creation.

Thank you again, and we look forward to seeing what you will accomplish in the new year!

PCUI Framework Migrated to TypeScript

· 2 min read

PCUI is the open source, front-end framework for building amazing web-based tools like the PlayCanvas Editor, glTF Viewer, Texture Tool and more!

glTF Viewer PCUI Interface

Today, we are excited to announce the release of PCUI version 2.10.0! This new release includes a number of significant updates and improvements that will make building web tools with PCUI even easier and more efficient.

One of the biggest changes in this release is the migration of the entire source code from JavaScript to TypeScript. This will provide a number of benefits to developers, including improved type checking, better code completion and IntelliSense in IDEs, and easier maintenance and refactoring of code.

PCUI API Reference

In addition to the source code migration, we have also released a new API reference manual built with Typedoc. This will make it easier for developers to understand and use the various APIs and components available in PCUI.

TypeScript developers will also be pleased to know that we have improved the TypeScript declarations in this release, making it even easier to use PCUI in a TypeScript project.

Finally, we want to highlight the open source nature of PCUI. We believe in the power of the open source community to build great software together, and we encourage open source developers to get involved with the project. Whether you want to contribute code, report issues, or just provide feedback, we welcome your participation. Explore the PCUI repo today on GitHub!

Thank you for using PCUI, and we hope you enjoy the new release!

Porting Unreal Scenes to the Browser with PlayCanvas - Developer Spotlight with Leonidas Maliokas

· 5 min read
Steven Yau
Partner Relations Manager

Welcome to Developer Spotlight, a new series of blog articles where we talk to developers about how they use PlayCanvas and showcase the fantastic work they are doing on the web.

Today we are excited to be joined by Leonidas Maliokas, a freelance web and games developer for Solar Games.

He will show us how Solar Games ported a metaverse experience from Unreal to PlayCanvas in the video presentation below. Specific areas covered are:

  • Converting scenes and assets from Unreal to PlayCanvas
  • Runtime and load-time optimization
  • Lighting and post processing
  • Multiplayer with Colyseus
  • Ready Player Me avatar integration
  • Spatial-aware audio chat with Agora

Presentation Slides

Hi Leonidas, welcome to Developer Spotlight! Tell us about yourself and your studio

Hey, I’m Leonidas from Solar Games (formerly known as Pirron 1)! I’ve been working with interactive 3D websites since 2012. I used to work as a civil engineer before turning my hobby and passion for gamedev into a full time job using PlayCanvas.

Together with doing PlayCanvas contracts of all sorts, like product configurators, games and promotional sites, I’ve been researching how to extend the PlayCanvas engine and editor. Adding open world terrains, special effects and easy to use networked controllers to match features normally found in native only game engines, led to founding Solar Games.

We offer Uranus Tools for PlayCanvas, a collection of plug and play scripts to supercharge your PlayCanvas creation pipeline. You can find out more about our company’s services at https://solargames.io.

We are also working on Aritelia, a procedurally generated open world social MMO in PlayCanvas. This is still in development but you can already give it a try with the pre-alpha tech demonstration that was released last year.

Why did you choose PlayCanvas?

It was actually an easy choice for us: by reviewing the mainstream WebGL libraries and platforms, PlayCanvas did stand out for:

  • Offering an integrated editor and publishing solution. Even after all these years, the ability to easily share projects and builds and collaborate with your colleagues in real-time is something unique to PlayCanvas.
  • The PlayCanvas team is very productive and professional in the way it moves the platform forward.
  • The open source PlayCanvas engine provides a very effective and easy to use API.

What were the initial challenges and how did the team overcome them?

The main challenge was the lack of certain features and tools. For example things that you’d take for granted in a native game engine like a terrain system, post effects, automatic instancing and level of detail were missing.

The good news was that even before the PlayCanvas Editor API was officially released, it has always been possible to extend the PlayCanvas Editor. We were able to write our own editor extensions and quickly make them productive in our development pipeline.

Other developers and companies became interested in our extensions and we started offering them in our company’s asset store.

How is building an HTML5 game/experience different from a native game/experience?

Several concepts like rendering, resource loading, game logic and state management are quite similar. But there are some unique concepts when it comes to web-based experiences that can be challenging.

In particular, download times, different display sizes and pixel ratios, a broad spectrum of device specs, and also platform and browser compatibility.

Taking into account these factors is mandatory when building a high-quality HTML5 experience.

What are the team's favorite features of PlayCanvas?

Our favorite feature is the editor, by far. The fact that it is collaborative in real time makes PlayCanvas the best tool for teams to work together. Also, the fact that PlayCanvas has version control integrated is pretty cool! Something else I would add is that PlayCanvas provides a very clean API to work with. Seriously, not only HTML5 devs but also native game devs should give PlayCanvas a try. It’s a great tool to quickly be productive!

Other than that:

  • Asset pipelines like enabling texture compression.
  • The engine API and the constant addition of new features by the PlayCanvas team.
  • The community - many greetings to everybody!

What is on the feature wishlist for PlayCanvas this year?

  • Having the PlayCanvas WebGPU renderer available to play with.
  • Full support of the new node based shader editor.
  • Asset variants for specific platforms e.g. serve smaller textures on mobile.

How do you see HTML5 games/experiences evolve over the next few years?

It’s definitely an exciting time for developers and companies working with HTML5 content. Both the technology has moved forward with standards and frameworks being more robust and powerful than ever, and the devices capable of running HTML5 experiences are very capable.

The metaverse is already leveraging HTML5 to deploy worlds and experiences across traditional web2 and newer web3 websites.

Pixel streaming is the only valid contender when it comes to what HTML5 can offer. I would definitely welcome a feature where pixel streaming is a viable option since it’s a great concept. But right now I don’t see this happening soon.

There are so many opportunities around HTML5 and I see a very positive future for everyone involved.

Thank you very much for your time and we look forward to your presentation

Thank you for this opportunity to showcase our work!

Useful links:

Stay tuned for more Developer Spotlights in the future!

Web AR Experiences - Developer Spotlight with Animech

· 7 min read
Associate Partner Support Engineer

Welcome to the third instalment of Developer Spotlight, a series of blog articles where we talk to developers about how they use PlayCanvas and showcase the fantastic work they are doing on the Web.

Today we are excited to be joined by Staffan Hagberg, CMO of Animech.

Hi Staffan, welcome to Developer Spotlight! Tell us about yourself and Animech!

Animech was founded back in 2007, in the city of Uppsala, Sweden. With a mix of 3D artists, engineers, developers, and UI/UX experts, we have a team of 40 people and all the competence in-house. The studio started in the early days of real-time 3D. It was a mix of CAD engineers and developers who realized the power of visualization for selling complex products in the life sciences segment.

Since then, we have visualized pretty much anything you can think of online and offline. We’ve worked in VR, AR, MR, phones, tablets, desktops, and pretty much any other device that has a browser. We have developed VR applications for cars, the first real-time 3D configurator in native WebGL ever developed, one of the world's first configurators for Oculus Rift Devkit and much more.

We have also visualized experiences for hotel safes, medical instruments and lab products for 7 of the 10 largest life science companies, as well as built 3D converters from Unreal to glTF and a bunch of custom tools specially built for PlayCanvas.

Our core business is real-time 3D. We push the boundaries every day trying to invent new ways of using 3D, where our solution makes the difference.

Bathroom Planner for Iconic Nordic Rooms

Why did Animech choose PlayCanvas?

After an extensive search for a WebGL-based engine, we evaluated a few and selected PlayCanvas for its performance, out-of-the-box features, its extensibility and its valuable editor. Our customers expect the highest level of visual quality along with a smooth browsing experience - without the need for an app or plugins. PlayCanvas truly helps us deliver.

As for our artists’ perspective, they think it was (and still is) the most artist-friendly WebGL editor out there, with the added bonuses that it is open source, and supports many important features, such as PBR, tonemapping, render layers, etc.

Did your team face any initial challenges? How did you overcome them?

It's always challenging when customers have high quality and performance expectations. Though, at the same time, that is what drives us. Being able to create stunning 3D experiences linked to real business value is a unique opportunity and challenge. Adding AR to that process helps you to stand out against competitors.

Our particular challenge was to dynamically create an AR model of a procedurally generated mesh as a generic function. Our solution was to create a SaaS service that can take of whatever 3D object you’re looking at in PlayCanvas, and on the fly create AR models for both iOS and Android devices (ARKit or ARCore).

You’ve built several Web AR experiences. Can you tell us a little about them and how important you think Web AR is today?

We have been early adopters of both AR and VR, both as standalone applications and on the web. We believe it's important to use AR not as a gimmick, but as an application that provides real value for the user. For example, looking at how that greenhouse would look in your actual backyard or similar. In that sense, Web AR will get more and more important, both as something that stands out but also as something that provides value for users.

Why do you think that your clients want Web AR in their experiences?

To offer something more to their customers - both in marketing value and actual value. To help users make smarter, more informed decisions.

We have also developed our own web based 3D converter that takes our PlayCanvas 3D models to glTF and USD on the fly. It is a server side solution that takes everything we develop to AR.

How is building a web experience different from a native experience?

You must optimize for both loading time and performance. The application could be run on a wide range of devices – from several years old phones to high-end desktops.

The application is accessible to a wider audience since they don’t need to install anything.

What are the team's favorite features of PlayCanvas?

As a team consisting of both 3D artists and developers, PlayCanvas’ online editor provides a fantastic way to collaborate, prepare and preview our projects before pairing the solution with a stunning web UI or deploying it as a standalone viewer.

Our 3D artists also enjoy how the editor is robust and easy to use, and how its design promotes collaboration. Powerful material settings (per-texture UV and color channel, vertex colors, blend types, depth test/write, etc.), flexible texture compression and a fast response by the team when reporting bugs and requesting features are also great.

What is on the feature wish list for PlayCanvas this year?

As the future for 3D on the web continues to evolve, we are excited to see support for more accessible 3D formats, such as the glTF standard by the Khronos Group, which PlayCanvas are advocating for as well.

Beyond this, here are some things we look forward to:

  • Node-based shader editor
  • Support for editor extensions
  • Post processing (HDR bloom, chromatic aberration, SSAO, motion blur, color grading, eye adaption, etc.)
  • More customizable asset import options
  • Reflection probes
  • Material instances (see Unreal Engine)
  • Debug visualization (see Unreal Engine’s View Modes)
  • Expose currently hidden options in the editor (detail maps, etc.)

How do you see AR and 3D e-commerce evolve over the next few years?

The possibilities are enormous. The question is when do people actually start using AR. It has been around for many years, lots of interesting solutions and demos have been built, but the real value of AR has not reached the masses yet.

I think we are closing in on that though. Just the other day I was about to buy a new espresso coffee machine. One supplier had an AR model online in the e-store with which I could see that it looked good and covered my needs. With just one static USDZ file. It is such an easy way of helping your customer to make the right decision. Imagine how much value you add if you can see configured 3D models in AR and really see the potential of what you are about to buy.

Next phase would be to configure and change your 3D model directly in AR-mode which would make the experience even stronger.

As the graphics quality gets better and better online and the fashion industry keeps on digitizing their customer journey, AR will probably be the best and easiest way of trying on fashion products like bags, watches, jewelry and clothes. It will reduce faulty orders on a massive scale if you can do a virtual fitting before buying stuff online.

Animech helps our customers to get what they want. Simply put: we empower people to make smart decisions through intelligent visualization.

Thank you, Staffan! Is there anything else you'd like to share?

You can visit our website here. You can also follow us on Twitter! You can also check out our other projects here:

glTF Viewer Arrives on Mobile with AR Support

· 3 min read
Elliott Thompson
Software Engineer

Today we’re excited to announce the next major release of our glTF viewer. This version makes the viewer an ideal tool for reviewing how glTF models render on mobile as well as in augmented reality!

TRY IT NOW

View Models in AR on Mobile

Once a model has been loaded into the viewer on mobile, you’ll be given the option to drop into an augmented reality experience. The mode you get currently differs based on the operating system you’re using.

glTF Viewer AR on iOSglTF Viewer AR on Android

Quick Look mode on iOS (left) and WebXR mode on Android (right)

On iOS, the model will be loaded with Apple’s AR Quick Look mode (above left), while on Android the model will be placed into your environment using WebXR (above right).

Mobile-Optimized Design

glTF Viewer Mobile StartglTF Viewer Mobile ControlsglTF Viewer Mobile Hierarchy

It’s now possible to verify the content and rendering of your assets no matter which device you’re working on. The viewer has been redesigned using mobile-first principles, so you can explore glTF content just as well on mobile as you can on desktop. The UI scales up or down depending on the device screen size and takes an uncluttered approach to ensure you can focus on the glTF content itself even on very small screens.

Quickly Load Models on Mobile Devices

When loading PlayCanvas viewer v3.0 on desktop, you’ll be presented with the option to load a glTF model from a URL.

glTF Viewer Start Screen

When this is used, the application will generate a QR code you can scan to share the current viewer scene between your devices or others:

Share with QR Code

New PlayCanvas Theme

The latest release of PCUI (v2.7.0) enables the use of additional themes in applications built using it. This allowed us to apply a new color theme to the model-viewer:

New PCUI Theme

The new muted gray tones of this theme should allow users to more readily focus on their model content. Over the coming months, you’ll begin to see this new theme applied to more applications in the PlayCanvas ecosystem! Be sure to pass any feedback onto us using the issue tracker of the PCUI library.

Open Source

PlayCanvas is fully committed to an open source strategy and our glTF viewer is therefore made available to you on GitHub. It is a TypeScript application built on PlayCanvas PCUI front-end framework and, of course, the PlayCanvas Engine runtime.

These open source projects have been years in the making and would not have been possible without the amazing OSS community. So why not explore our various GitHub repositories and consider making some contributions of your own. We also appreciate feature requests and bug reports, so don’t be shy!

FORK THE VIEWER ON GITHUB

We hope you find the new and improved glTF viewer useful for your projects. Stay tuned for further updates to it in the coming months!