PLAYHACK December - Player Character
PLAYHACK is our fun monthly game building session. Throughout the month I'll be posting tips and tricks to help you get a game made by the end of the month. Don’t forget, these are just examples. You can make any game you like. Read more about this month's PLAYHACK.
![]()
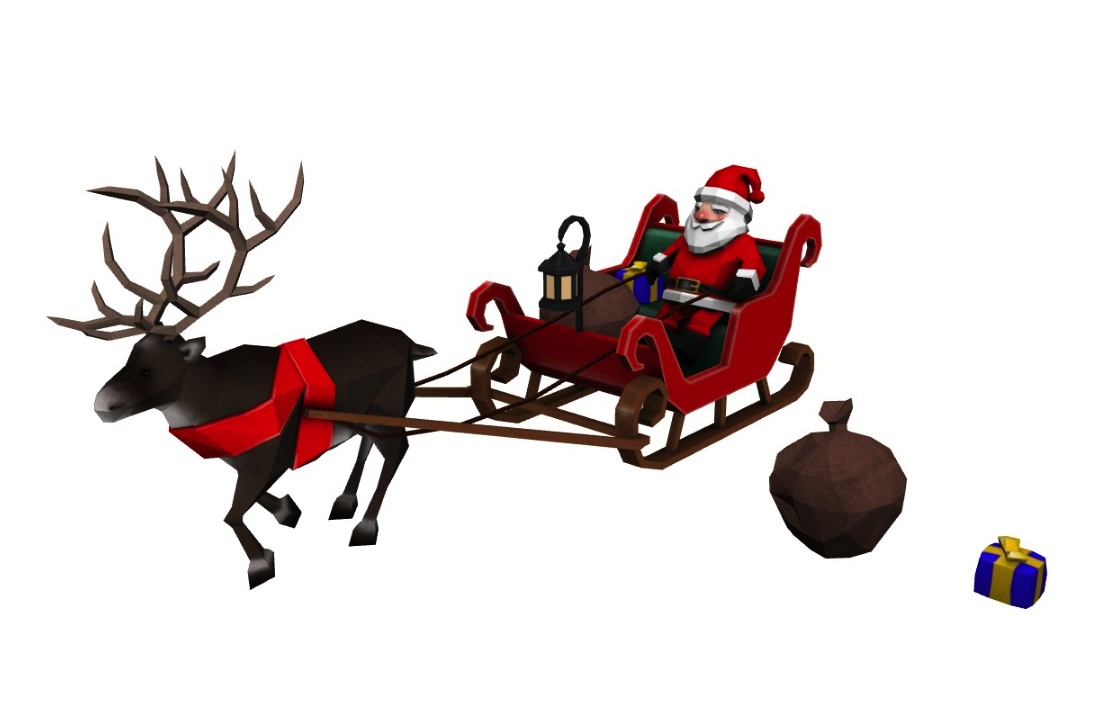
Use W and S to move the sleigh. Press SPACE to switch to mouse control.
In the coming weeks, I'll be taking you through how to make a complete game in PlayCanvas - from very beginning to very end, with only basic programming knowledge required!
We're going to be making a side-scrolling endless runner game, where Santa must pick up presents and avoid various things to deliver presents on time! However, the techniques we'll be using will be applicable to many kinds of games.
To follow along with this tutorial, fork the PLAYHACK December project to get started. To see what we’ll be making this time, look here. Or just check out the embedded app above.
So you've forked the repository and got it open in the editor. We're going to need to make a few changes to start making our game.
Camera
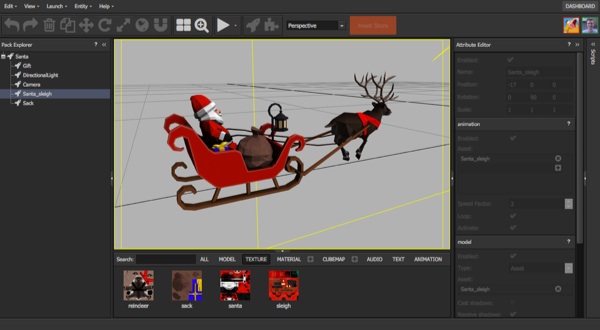
Firstly, the camera. There are two camera types in PlayCanvas - Perspective and Orthographic. Perspective is what you want for most 3D games – it’s how things look in life. However, our game is pretty much 2D - which means an Orthographic projection would be best for us. To make the switch, select the Camera in the Pack Explorer, then in the Attribute Editor on the right, change Projection from "Perspective" to "Orthographic."
If you test now by pressing the Launch button, you'll see that Santa is tiny in the middle of the screen! That's not what we want. We can fix this by reducing the Ortho Height attribute of the camera. Reduce it from 100 down to about 10, and now check the game. Santa's now a much better size!
Player
Now, we want Santa to start on the left of the screen, looking right. To make things easier for us, we'll align our camera along the Z-axis so that moving things around on screen becomes easier for us later.
To do that, set the camera position to 0, 0, 10, and the rotation to 0, 0, 0. Santa should now be looking right at the camera in the middle of the screen. You can use the rotate and translate tools in the editor to move him to the right place, or you can select Santa_sleigh from the Pack Explorer and set his position to -17, 0, 0 and his rotation to 0, 90, 0. Great! Take a look at the game again. Santa's now in the right place, facing the right way. Lovely.
Let's get Santa moving. We're going to create two ways for Santa to move - by mouse and by keyboard. Let's create a new script, called Santa_Controller, and attach it to the Santa_sleigh entity we have.
To do this, right click on Santa_sleigh in the Pack Explorer, and select Add Component > Script. Now we can attach scripts to Santa. To attach a new script to Santa, simply type the name of the new script (in our case, "Santa_Controller") in the URL box of the Script Attribute we just added to Santa.
Player Controller
Now we've created the new script and attached it to Santa, let's edit it and make Santa do something! Click on the blue Santa_Controller.js link that should have appeared below the URL box to get editing!
You'll be greeted by a new script that should look like this:
pc.script.create('Santa_Controller', function (context) {
    // Creates a new Santa_Controller instance
    var Santa_Controller = function (entity) {
        this.entity = entity;
    };

    Santa_Controller.prototype = {
        // Called once after all resources are loaded
        initialize: function () {
        },

        // Called every frame, dt is time in seconds since last update
        update: function (dt) {
        }
    };

    return Santa_Controller;
});
Let’s think about what we need to do to make Santa move up and down. Well, we’ll need the speed we want him to move – so let’s put that as an attribute so we can change it easily.
pc.script.attribute("speed", "number", 10);
pc.script.create('Santa_Controller', function (context) {
Now, let’s make 2 functions – one that moves Santa up, and one that moves Santa down.
    // Called every frame, dt is time in seconds since last update
    update: function (dt) {
    },

    moveUp: function(dt) {
        this.entity.translate(0, this.speed * dt, 0);
    },

    moveDown: function(dt) {
        this.entity.translate(0, -this.speed * dt, 0);
    }
};
The translate function is one that all entities have, and simply moves the entity by a specified amount. In this case, we want Santa to move up or down by the speed, multiplied by the amount of time passed in the current frame. We do this so that Santa will move the same speed however fast our game is running!
Keyboard Controls
Now, let’s look at keyboard controls. To do anything with the keyboard in PlayCanvas, we need to use context.keyboard. context is available in all scripts, and allows us access to all the data our game has to offer – in this case, we need the keyboard, which deals with keyboard input.
We can use context.keyboard.isPressed to check if specific keys are pressed – if W or S are pressed, we’ll move Santa up or down accordingly. We’ll need to check every frame, so put the following code in the update function:
if (context.keyboard.isPressed(pc.input.KEY_W)) {
    this.moveUp(dt);
}
if (context.keyboard.isPressed(pc.input.KEY_S)) {
    this.moveDown(dt);
}
Before we test the game, however, there’s something we need to do. The editor needs to be told when we add an attribute to a script, so back in the editor, and go Entity > Refresh Script Attributes. A box should come up underneath our Santa_Controller.js script allowing us to change the speed of Santa.
Now test the game – we should be able to move Santa up and down now using the W and S keys! Change the speed in the editor until you find something that feels fun.
Mouse Controls
That’s all good, however, we want the option of using the mouse or the keyboard! Let’s add another attribute in our script that will allow us to change between mouse and keyboard when testing:
pc.script.attribute("keyboard", "boolean", true);
If you do Entity > Refresh Script Attributes again, you’ll see another attribute that we can change, and this time it’s a check box. That’s all a Boolean is – a true or a false value. Either off or on. If keyboard is ticked we’ll use the keyboard input, and if it’s not we’ll use the mouse.
To do things with the mouse in PlayCanvas, we have to use – you guessed it – context.mouse! Mouse input is going to be slightly more work than keyboard, but we’ll be okay. We need to get the position of the mouse on screen, compare it to Santa’s position, and move Santa towards the mouse.
So, we’ll need a variable to store the mouse position, and we’ll also need some way of getting the mouse position. For that, we’ll need a listener.
A listener is simply a function that we define, that gets called by a specific event. In this example, the event we want to “listen” for is the mouse moving.
So, let’s set this up:
// Called once after all resources are loaded
initialize: function () {
    //Used to store the mouse position
    this.pos = new pc.Vec3();
    context.mouse.on(pc.input.EVENT_MOUSEMOVE, this.onMouseMove, this);
},
We’ve got a variable called pos that we’ll store the current mouse position in. The next line is what creates our listener. We’re saying when there’s a mouse move event, we want a function called onMouseMove to execute. Let’s write that function now:
moveDown: function(dt) {
    this.entity.translate(0, -this.speed * dt, 0);
},

onMouseMove: function () {
    // Use the camera component's screenToWorld function to convert the
    // position of the mouse into a position in 3D space
    var depth = 10;
    var cameraEntity = context.root.findByName('Camera');
    cameraEntity.camera.screenToWorld(event.x, event.y, depth, this.pos);
}
In the onMouseMove function, which gets called every time the mouse moves, we have to do some work to get the position we need. Because the mouse is only on a 2D screen, we have to look at use the camera’s screenToWorld function to get the position we want.
Have a look at this mouse tutorial if you want to know more about how this works!
Now we’ve got the position of the mouse in this.pos – we can use that to move Santa! Let’s update our update function:
update: function (dt) {
    if(this.keyboard) {
        if(context.keyboard.isPressed(pc.input.KEY_W)) {
            this.moveUp(dt);
        }
        if(context.keyboard.isPressed(pc.input.KEY_S)) {
            this.moveDown(dt);
        }
    } else {
        if(this.pos.y > this.entity.getPosition().y) {
            this.moveUp(dt);
        }
        if(this.pos.y < this.entity.getPosition().y) {
            this.moveDown(dt);
        }
    }
},
First things first - we now check to see if we’re using keyboard or mouse. If we’re using the keyboard, we do exactly what we did before – otherwise, we can use the mouse for input.
We have the mouse’s position stored in this.pos – now all we have to do is compare it to Santa’s position. If the mouse is above Santa, we move him up, and if it’s below, we move him down.
Test the game and we should be able to use either the keyboard or the mouse to move Santa, depending on whether or not you’ve ticked the keyboard box!
That’s all for this time – next time we’ll look at adding presents for Santa to collect!