Primitives are Dead! Long Live the Model!

One of our most requested features has landed today, and with it, it brings new power (and no new responsibility). Our most requested feature? Applying textures and materials to primitive shapes in the Designer.
A Bit of History
When we created the primitive component, we had simplicity in mind. Create box, set the color. That's it. Also, this was another time, when material editing wasn't available as part of the PlayCanvas Designer. So we created two components, the model, which allowed you to upload a 3D asset complete with materials and textures; and the primitive, the little brother, which only allowed you to set a color.
To get us going this was great, but pretty soon you all started demanding more from the primitive. First it was a lack of a setVisible() method which existed on the model. Then you wanted to set a texture map, but in reality you wanted a full-on material.
Long Live the Model Component
Once we realized we were going to be recreating the primitive component with these new features, we gave it a bit of thought and came to the conclusion that the primitive is just a model component with a special built-in set of models, i.e. box, sphere, capsule, etc. So, combining the two makes perfect sense. We give you the power and flexibility of the model component, but with the ease and speed of the primitive component.
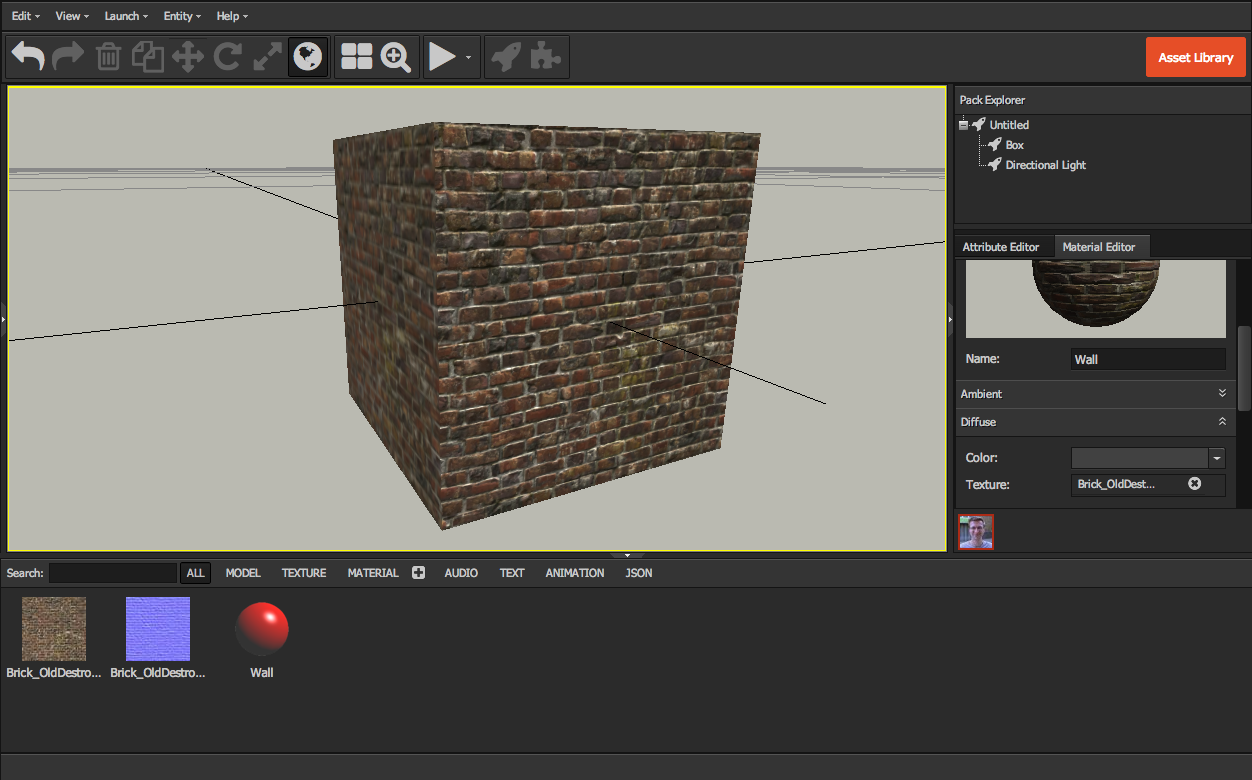
How it Works
He's a quick 4 step guide to create a primitive and applying a material.
1. Upload some textures. For example these brick textures from gametextures.com
2. Create a New Box. From the Entity menu select "New Box"
3. Click on the Box to select it, then click on the Box again to select the material.
4. Click Create Material, then open up the diffuse and normal panels in the Material Editor and drag the assets from the Asset Explorer into the material slots.
We hope you enjoy the new power we've given you today. Just enjoy it responsibly. 😉
For more information on materials see the page in our documentation.