50 posts tagged with "editor"

View All Tags

Import Full Model Hierarchy into PlayCanvas

· 3 min read
Steven Yau
Partner Relations Manager

The PlayCanvas team are very excited to fully release the Import Hierarchy pipeline feature in the PlayCanvas Editor!

Edit Hierarchy

With this feature enabled, any imported FBX will create a Template asset which contains the full node hierarchy as entities representing sub-models of the model. This gives users greater flexibility in manipulating mesh instances in the model directly in the Editor.

Render assets will also be created that can be used with the Render Component and allow users to add an individual mesh instance of a model in the scene.

For example, an imported car FBX model would create several Render assets, doors, wheels, wipers etc. The wheel assets can be used independently from the rest of the car model to create a tire wall.

With the model hierarchy being editable in the Editor, this opens a number of uses that weren't possible before:

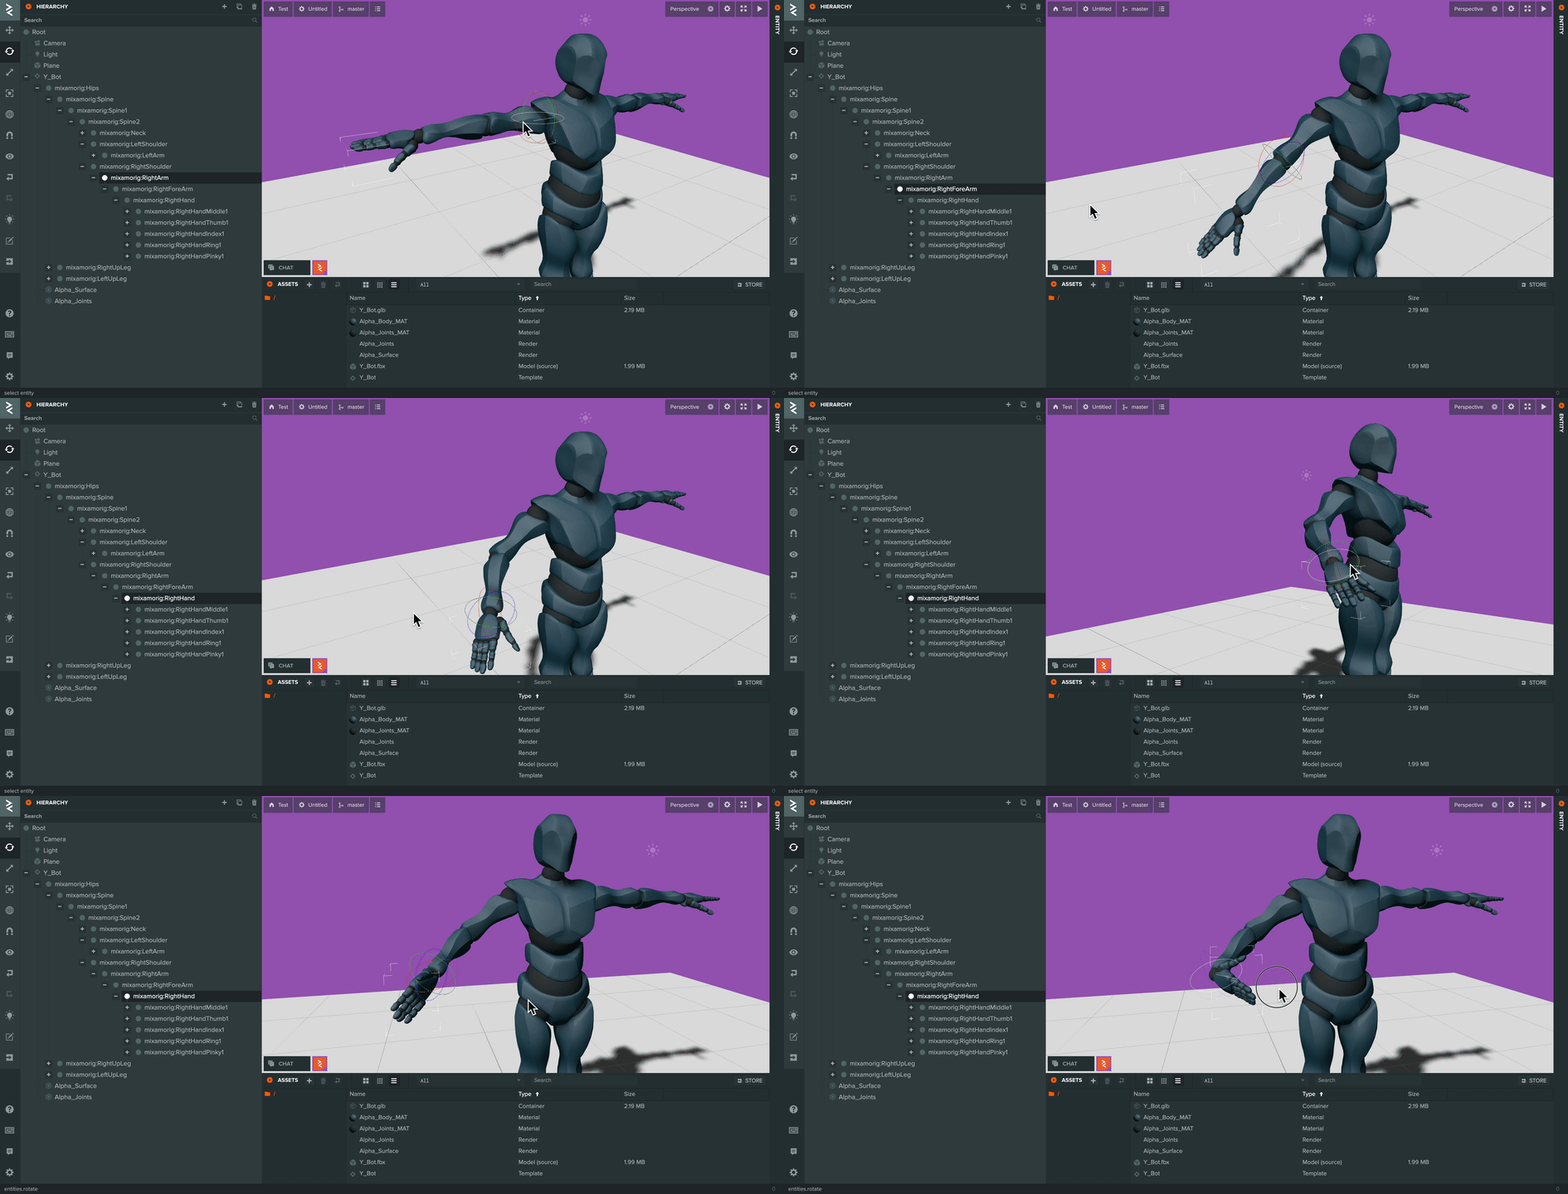
  • Attach other Entities and/or models as part of another model's hierarchy such as adding a helmet to a character's head.
  • Move/Rotate/Scale sub-models directly in the Editor such as moving/adding/removing chairs around a house model.
  • Use the Render assets elsewhere in the scene for decoration or customization.
  • Add components and/or scripts to individual nodes such as attaching particle effects to animated parts.

Place Item in Hand Place an item in the hand of a character

Copy Parts of Hierarchy Copy a sub-part of a imported asset

However, please note that while the Model Component is compatible with both the Animation and Anim (State Graph) Component, the Render Component/Import Hierarchy feature is only compatible with the Anim (State Graph) Component.

Going forward, we will be marking the Model and Animation Components as 'legacy' but if you have an existing project using these components, please do not worry. None of the existing functionality is being removed and you will not be forced to update projects to the new pipeline for continued development. Although no new features will be added to the Model Component, the PlayCanvas team will continue to fix bugs with the existing pipeline until our next major version (2.0.0) of the engine at the earliest.

You can even mix both pipelines in the same project if you wish to take advantage of the features in the new pipeline in an existing project. However, please bear in mind that this can add complexity to the project code.

The Import Hierarchy asset task will be enabled by default for newly created projects. If you would like to use this feature in your existing project, please consult User Manual for details.

Transitioning to the New Render Component and Fill Mode API

· 5 min read
Steven Yau
Partner Relations Manager

Hi everyone!

This is a different blog post to what we normally do but with some big changes coming soon, we wanted to give context and advance notice of said changes and more importantly, how they may affect you across the PlayCanvas platform.

Moving from Model Component model import pipeline to new Render Component

As part of the work to enable the import of a model’s hierarchy into the scene, we have introduced Render Asset and Render Component as new features of the Engine and Editor.

Import Hierarchy Preview

Going forward, this will be the default way to render imported models and gives developers greater flexibility in manipulating mesh instances in the model directly in the Editor. For example, with the new pipeline you can import a house FBX model and only use the door mesh instance in the scene instead of the whole model.

However, please note that while the Model Component is compatible with both the Animation and Anim (State Graph) Component, the Render Component/Import Hierarchy feature is only compatible with the Anim (State Graph) Component.

(More details will be shared in an upcoming announcement, stay tuned for that!)

For existing projects using the Model Component, please do not worry. None of the existing functionality is being removed and you will not be forced to update projects to the new pipeline for continued development. Although no new features will be added to the Model Component, the PlayCanvas team will continue to fix bugs with the existing pipeline.

You can even mix both pipelines in the same project if you wish to take advantage of the features in the new pipeline in an existing project. However, please bear in mind that this can add complexity to the project code.

The expected changes over the upcoming months are as follows:

  • Add/Rename a Project Setting to switch between the two mesh import pipelines (Currently, this is the ‘Import Hierarchy’ setting).
  • Newly created projects will default to using the Render Component pipeline.
  • developer.playcanvas.com tutorials will be updated to use Render Component (playcanvas.github.io engine examples have already been updated).
  • The template projects (Blank Project, Model Viewer Starter Kit, VR Starter Kit) will be updated to use Render Component.
  • User Manual updates and mitigation steps from using the Model Component to Render Component pipelines.

Breaking change to PlayCanvas Fill Mode API

We want to make the PlayCanvas engine as flexible as it can be for the widest range of use cases for web developers. To do so, we occasionally have to break existing APIs that may have made sense when they were first introduced, but not today.

One such API is the Fill Mode related functions on pc.Application:

These functions affect the canvas element size in the DOM as it was long assumed that apps made with PlayCanvas are either be iframed or fullscreen/full document apps.

However, there has been more requests about having more control of the canvas element rather than using iframes. The main reason is that it’s easier to communicate between the page and the PlayCanvas app without having to deal with iframe messaging.

Some examples:

Currently, there is no way for an end user to have full control of the canvas without patching the engine.

Also, from an architecture point of view, the Engine shouldn’t handle the size or position of the element that it is rendering in. The responsibility should be on the web document and how it wants to layout the elements on the page (e.g through stylesheets).

These changes will affect you directly if you are:

  • An engine only user as the HTML boilerplate will handle the resizing and positioning of the canvas. We will provide examples in the examples folder.
  • Any developer that changes the fill mode or resizes the Canvas at runtime. Some developers do this to handle landscape and portrait mode more effectively.

The current plan is deprecate these functions and move them to globally accessible functions on the page on the PlayCanvas Editor environment with as little (if any) downtime for projects or developers. At worst, you should only get a few warnings in the console log regarding deprecated function use.

The steps will be as a gradual rollout:

  • Add globally accessible JS functions in the Editor and publish HTML templates to replace the fill mode functions from the Engine.
  • Change the PlayCanvas Editor and published build templates to patch the Engine functions to call the global functions above with warnings that they should use the global functions instead.
  • Update the User Manual to document these global functions.
  • Deprecate the affected engine functions with warnings and reference the User Manual page.

Questions and Feedback

If there are any questions or areas that you would like to be made more clear, please post in the forums and the PlayCanvas team will be there to answer.

The PlayCanvas team are appreciative of your patience and continued support as we go through this transition!

Introducing the Anim State Graph

· 4 min read
Elliott Thompson
Software Engineer

We’re excited to be able to release a new system for creating fantastic and high fidelity animations in PlayCanvas!

Animation systems receive a set of inputs (button presses, current player speed, health, etc) and output a model's animation pose for the current frame. How an animation system goes from a particular set of inputs to the desired animation pose can become quite complicated, especially when writing this in code.

Animation Input and Outputs

With the release of the Anim component, Anim State Graph assets and Anim State Graph Editor, you will be able to design and develop intricate animation behavior for your game objects right in the PlayCanvas editor.

It’s now easier than ever to make your game characters move just the way you’d like, while writing minimal code in the process!

Having recently beta tested this feature with a number of developers, we’ve already seen some fantastic results! For instance, the developer of the popular online shooter venge.io is utilizing the anim state graph to drive character animations in their up and coming online RPG.

A clip of an early build of this game can be seen below, showcasing the blending of multiple animation clips. When combined together in a state graph they create realistic and fluid movement for the main character.

This animation system was entirely developed in the PlayCanvas editor using the anim state graph user interface. The state graph for the main character can be seen below:

We can’t wait to see what other developers can create with this system!

Features

Graph Layers - Split your animation behavior into separate layers. For instance: locomotion animations can be separated from facial expressions.

Multiple characters - Because anim state graphs are stored as assets, a single graph can be used to drive the animation of as many entities as you want by assigning your graph asset to multiple entity anim components.


Multiple characters utilizing the same anim state graph

While these two characters use different animations for their various actions, they share the same behavior. With the anim state graph you can update this behavior in one place while still using it with as many characters as you like.

How does it all work?

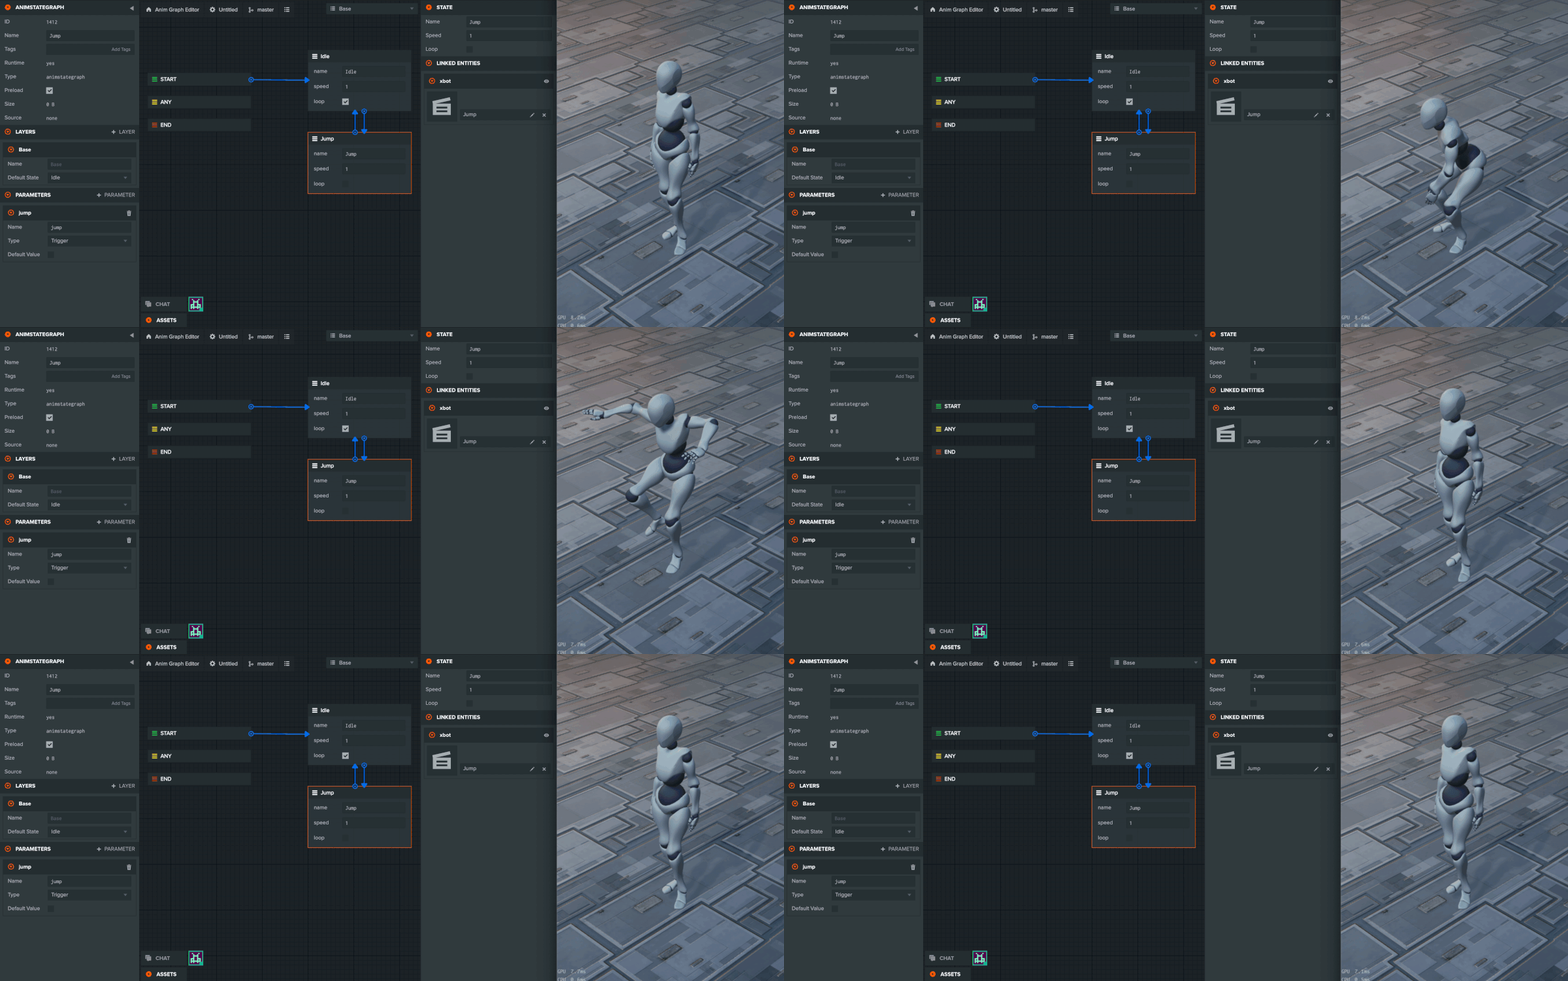
When opening an Anim State Graph asset you’ll be presented with a visual graph editor which allows you to define all of the different animation states your game object can be in. You can then connect these states using transitions.

Create anim state graphs using the editor UI

Each transition blends between two animations over a specified amount of time. You can adjust and tweak transitions to your liking and see the results in real time in the PlayCanvas launch page. You can then assign parameter conditions to each transition to define the circumstances under which that transition can fire. These parameter values can be modified in your scripts to control the behavior of your animation system.

Control anim state graph behavior in scripts using the anim component API

Once you’ve created your Anim State Graph you can assign it to your entity using the Anim component. At this point you can attach your animation assets to each state which will play when transitioning to that state.

Looking Ahead

Today only marks the initial release of our new animation system. We’ve got grand plans on how to push the system further. Here’s a few features we’ve got in the works:

Animation Events - These events can be set up to fire and specific points during the lifetime of an animation, allowing you to hook game logic into the behavior of your anim state graph. For example you could spawn a set of dust particles during the exact frame that your character lands on the ground after a jump.

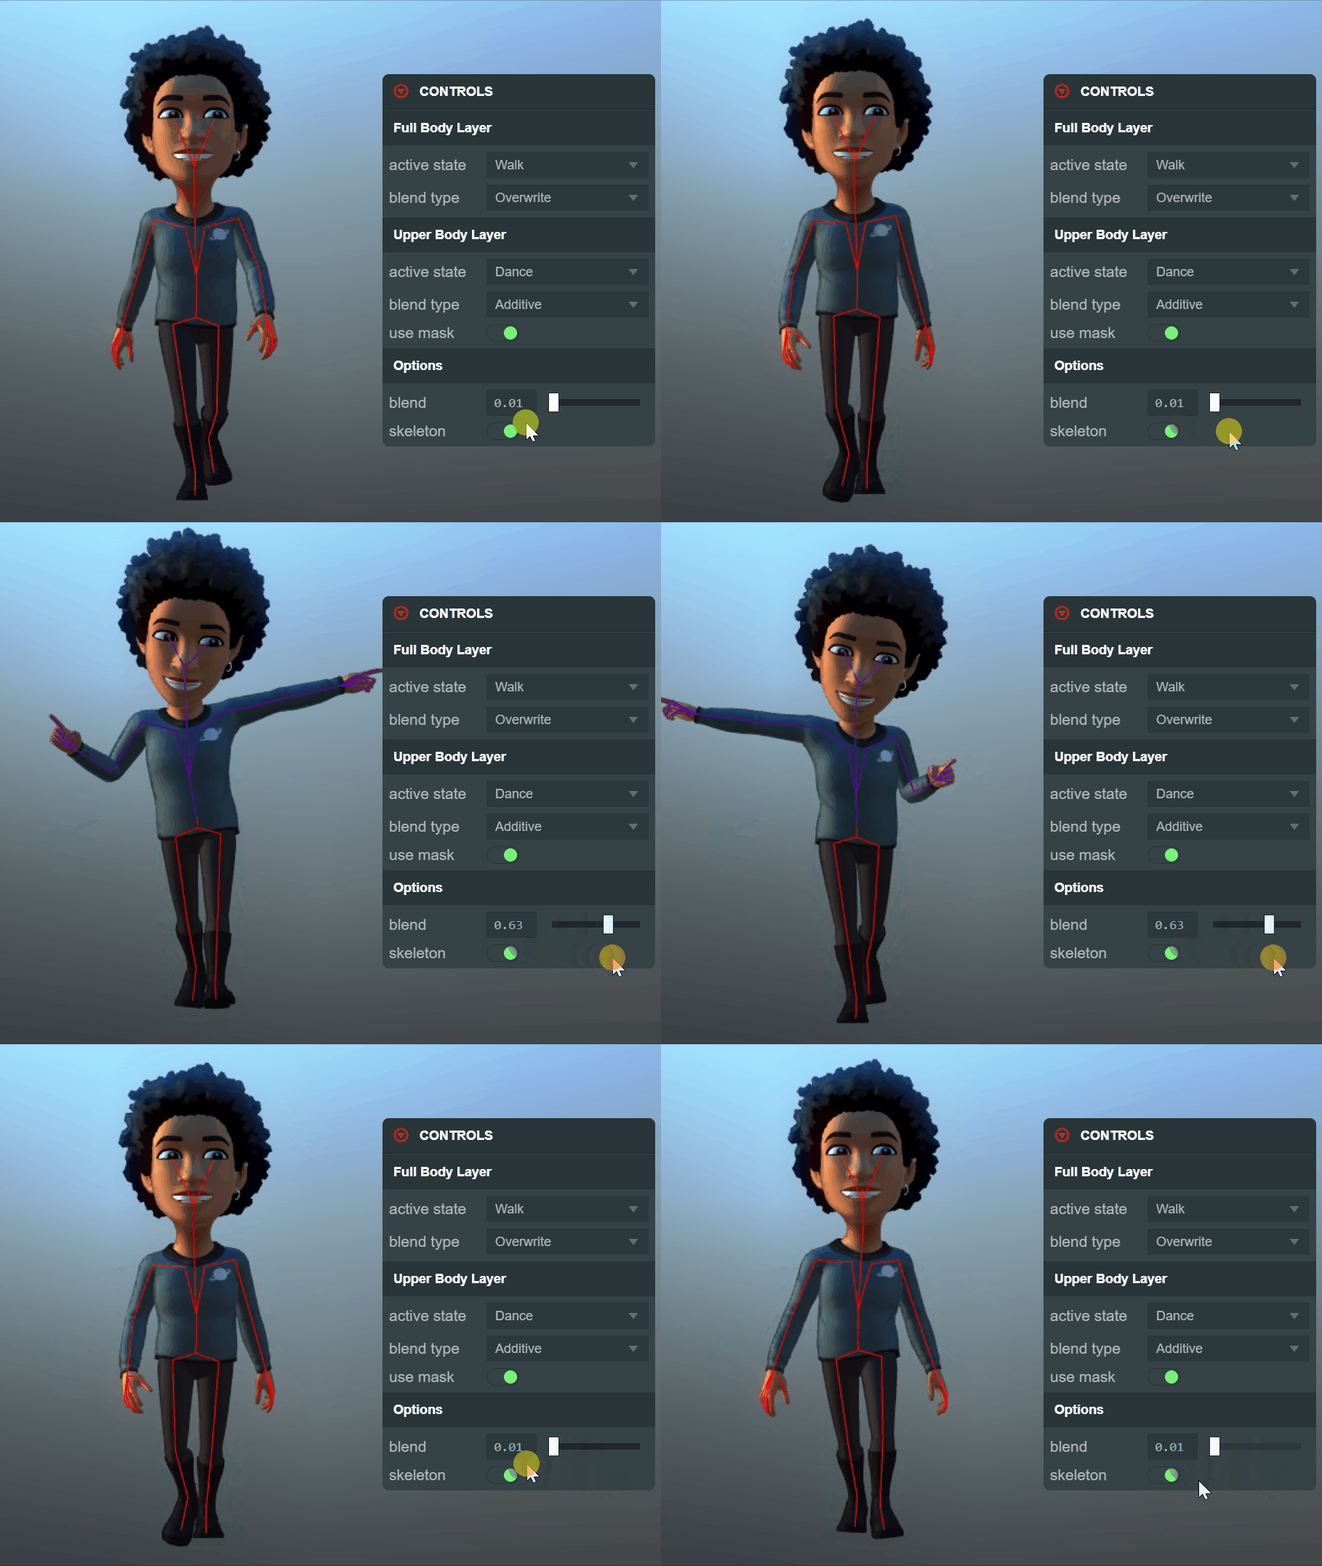
Layer Masking - You’ll be able mask your character animations on a particular state graph layer. For instance you could have only the bottom half of a character driven by a particular anim state graph layer.

Blend Trees - Directly control the blend between multiple animations in real time.


Blending three animations using a 2D cartesian blend tree

Animation Clips - Currently the anim state graph supports animation assets that have been imported into PlayCanvas. Clips will allow you to create extra animation assets within the PlayCanvas editor yourself! These will be great for quickly adding smaller animated flourishes to your game objects.

If you’re interested in using anim state graphs in your PlayCanvas projects, here’s some useful links:

Basis Texture Compression arrives in PlayCanvas

· 3 min read
Steven Yau
Partner Relations Manager

PlayCanvas implemented the fantastic hardware texture compression workflow in 2016 which allowed users to build bigger and better WebGL apps, even on low memory devices like mobile phones.

JPGs and PNGs are great formats for transmission over a network because they tend to compress nicely. But once the images are downloaded and handed over to WebGL, they must decompressed to raw RGB(A) data. Using hardware compressed textures is important as decompression is performed in silicon on the GPU which avoids the need to utilize lots of memory.

This 4096 x 2048 Earth texture is a 1.81MB JPG but takes a huge 33.6MB of VRAM when uncompressed!

Earth Texture

With hardware supported texture formats, we can retain a similar file size while massively reducing the amount of VRAM as seen below.

Legacy Texture Compression

Now, what if you reduce file sizes as well as the VRAM usage?!

That is what Basis gives us and it is available right now to all PlayCanvas users! Compressing the same Earth texture above, produces a 521KB Basis Texture.That’s a 68% saving over the smallest file size from the hardware supported formats 💪

Basis Texture Compression

Basis is an open sourced, texture codec that produces a highly compressed intermediate file format (.basis) that can be converted at runtime to a format that the hardware supports in GPU hardware. This means that there is only a single (and often smaller) file that is created to support a wide range of platforms.

As shown by the numbers above, Basis offers huge savings in download times for the end user which in turn, can lead to improved user engagement and click to open metrics for your application.

Let’s check out a real world example. The Space Base Texture Compression Demo from our previous blog article achieves the following VRAM usage and download sizes (gzipped) on desktop in Chrome:

Texture Compression Comparison

Texture VRAM Usage

Note that VRAM usage for Basis would ordinarily be the same as with legacy compression. However, PlayCanvas compresses normal maps to YYYX format instead of XYZ for improved quality so utilization is marginally higher.

Texture Download Size

That’s a big saving of 52% (19.5 MB) in download size from updating the project to use Basis while using a similar amount of VRAM!

And all it takes is a couple of clicks in the asset inspector to get started with Basis compression!

Enable Basis

To Recap

  • Only need one compressed file vs many (DXT, PVR, ETC1, ETC2, etc) for every texture
  • Up to 2.8 times smaller files and faster download times for your users
  • Up to 10x faster compression times with Basis
  • Similar savings in VRAM usage as hardware supported formats
  • Same one click process to compress textures

Basis texture compression is available to everyone right now so start crunching down those textures! More information can be found in the documentation including a migration guide.

And if you’re new to PlayCanvas, why not sign up today. We can’t wait to see what you make! Let us hear your feedback in the forums!

Introducing JSON Script Attributes

· 2 min read
Steven Yau
Partner Relations Manager

JSON Script Attributes Preview

We have levelled up the Script Attributes that makes it much easier to organize and group related attributes together.

Using JSON, developers are able to define a schema for a data object that has multiple attributes and have them grouped together in the Inspector.

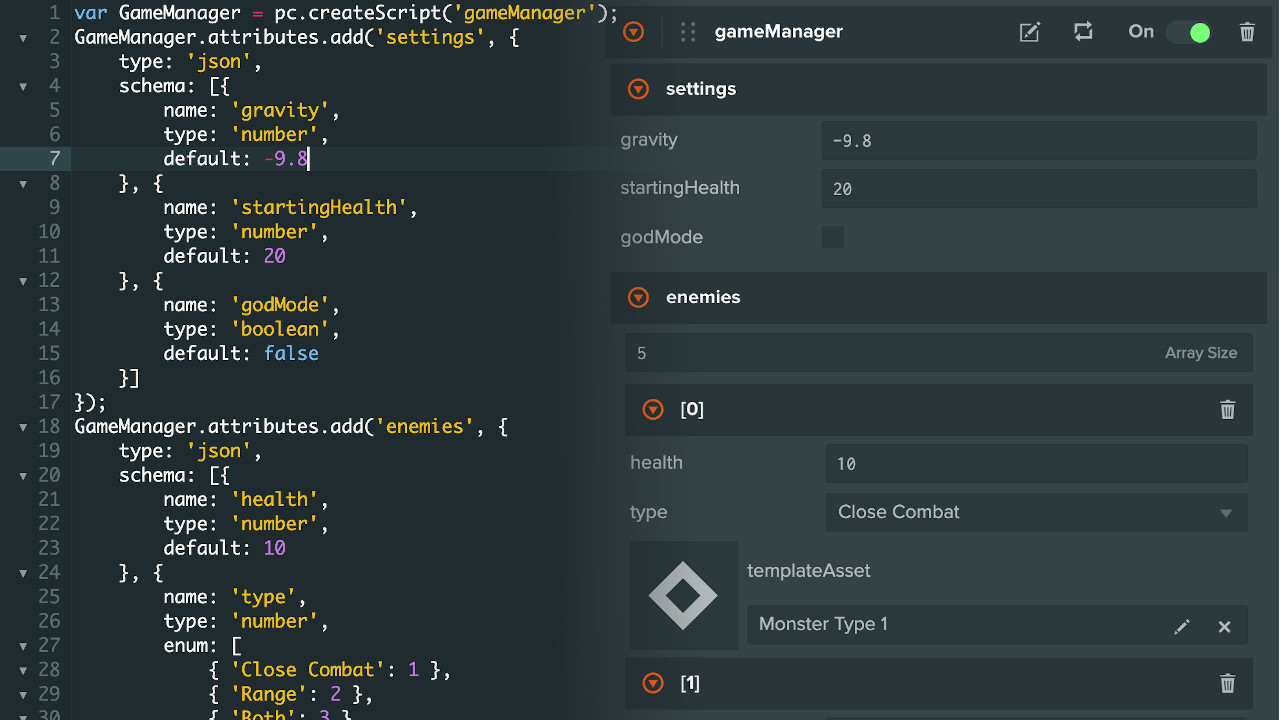
In the example below, we have created a JSON schema with the name ‘settings’ and has the attributes ‘gravity’, ‘startingHealth’ and ‘godMode’.

GameManager.attributes.add('settings', {
type: 'json',
schema: [{
name: 'gravity',
type: 'number',
default: -9.8
}, {
name: 'startingHealth',
type: 'number',
default: 20
}, {
name: 'godMode',
type: 'boolean',
default: false
}]
});

In the Inspector, the data object is shown as a collapsible section:

Collapsible script settings

Even better, these data objects can made into an array! This is a huge improvement over having to organize multiple attribute arrays that was difficult to update and error prone to maintain.

Example JSON schema for an array of enemies:

GameManager.attributes.add('enemies', {
type: 'json',
schema: [{
name: 'health',
type: 'number',
default: 10
}, {
name: 'type',
type: 'number',
enum: [
{ 'Close Combat': 1 },
{ 'Range': 2 },
{ 'Both': 3 }
]
}, {
name: 'templateAsset',
type: 'asset',
assetType: 'template'
}],
array: true
});

Becomes the following in the inspector which is so much cleaner!

Arrays of JSON objects

Read more in the documentation and let us hear your feedback in the forums!

Copy and Paste Assets between Projects

· One min read
Steven Yau
Partner Relations Manager

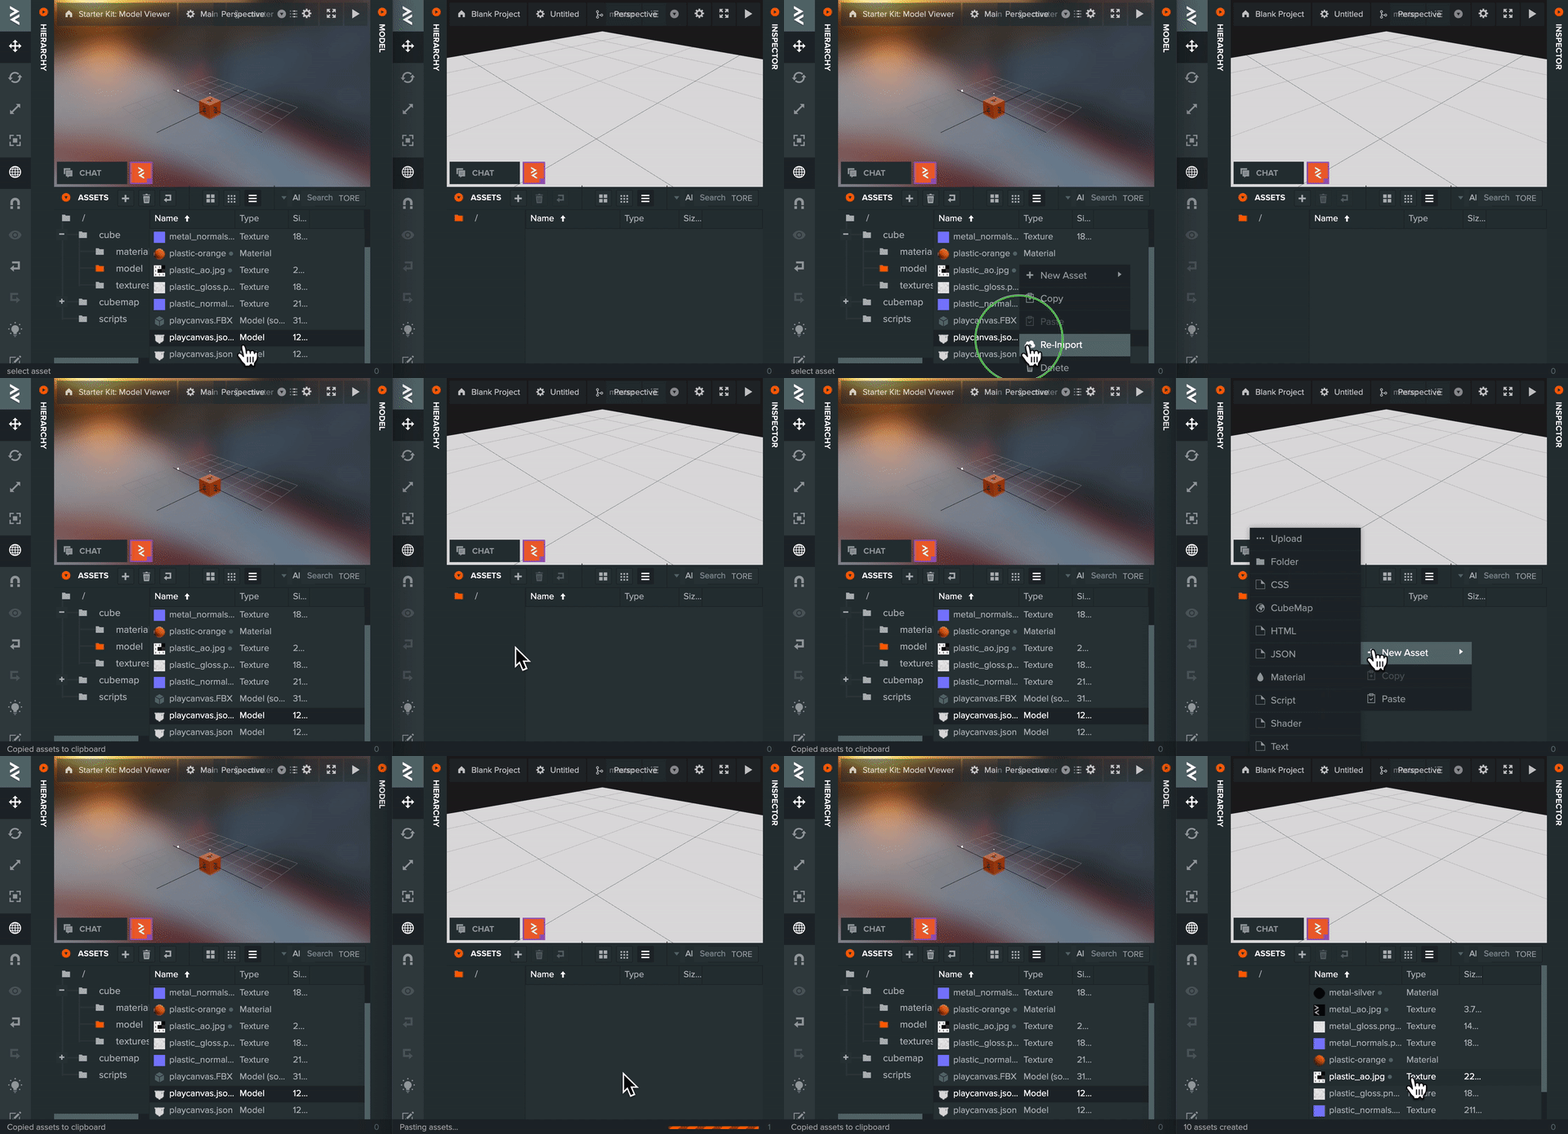
PlayCanvas has a pretty cool (but not widely known about) feature that allows you to copy and paste entities and entity hierarchy between two instances of the Editor. This can save a lot of time, particularly when setting up new projects.

Many of you have requested the ability to do the same with assets. Well, we listened - and now you can! 🚀

So if you need to grab some assets from another project, no more need to download from Project A and then upload to Project B. Just copy and paste in seconds, directly from project to project.

This makes it super easy to share reusable code and assets with your team and the rest of the PlayCanvas community, especially in combination with the recent launch of Templates to setup preconfigured Entities.

Use the context menu or the Ctrl/Cmd + C and Ctrl/Cmd + V hotkeys to copy assets across to your projects. 💪

Check out the documentation for more details.

Faster Load Times with glTF's GLB Format!

· 2 min read
Steven Yau
Partner Relations Manager

The PlayCanvas team is super excited to announce the Editor support of glTF GLB conversion with model and animation imports.

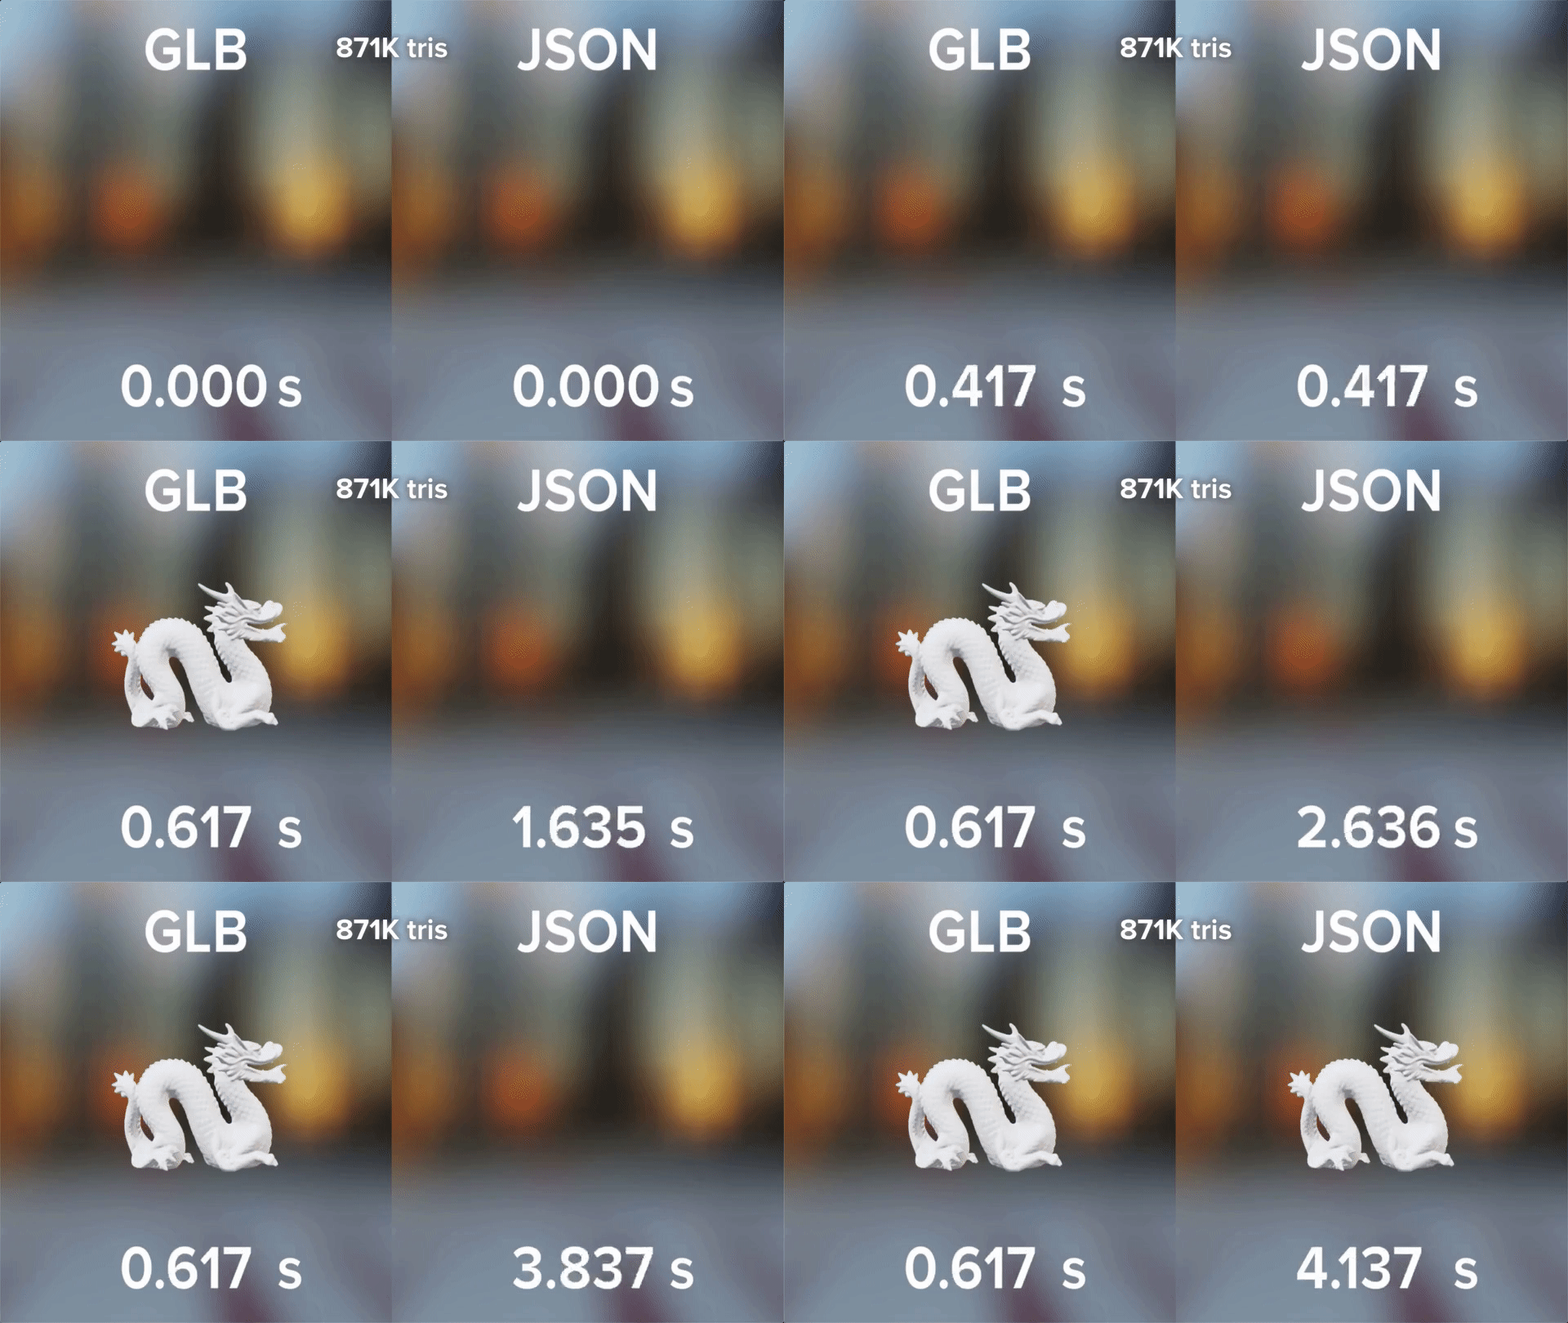
This gives developers an order of magnitude reduction in load times compared to the JSON format while keeping similar gzipped download size.

JSON vs GLB

Using the Stanford Dragon model (2,613,679 vertices, 871,414 triangles), we can compare GLB and JSON parse times on a Macbook Pro 16 inch.

The JSON format took over 3 secs just to parse the data, a peak memory usage of ~498 MB and a gzipped package size of 28.1MB.

JSON Load Time

GLB speeds ahead taking only 0.193 secs which is 17x faster, uses a peak of ~25.2 MB of memory and a gzipped package size of 25.7MB! 🚀

GLB Load Time

That’s a huge saving in time and means applications will become snappier and more responsive to users, especially for content heavy games and product showcases.

We will be deprecating the use of JSON and the default format that model and animations files. Newly created projects will default to converting to GLB and in existing projects, this can be enabled in the projects settings:

Convert to GLB

If you would like to replace your current JSON assets with GLB, the User Manual has more information about the process to migrate over.

The conversion to GLB supports the importing of multiple animations in a single FBX which will help improve content workflows.

Import Multiple Animations

Remember our awesome glTF 2.0 Viewer? That is now integrated into the Editor to inspect any GLB asset from the project. Just right and select ‘Open In Viewer’!

Open In Viewer

Also, we have exposed Animation Import Settings under Asset Tasks in project settings. These will allow developers to adjust a balance between animation quality and fidelity against file size.

Animation Import Settings

Our next steps are to add support for viewing and editing a model hierarchy in the Editor which will lead onto support for the importing of GLB files.

The team is hard at work designing and implementing these features so watch this space!

Supercharge your workflow with Template Assets!

· 2 min read
Steven Yau
Partner Relations Manager

It’s finally here! The PlayCanvas team is very excited to announce the public release of our new Templates feature! 🎉

Templates allow you to create preconfigured entities with all the values and child hierarchy as an asset reference.

This is a huge workflow boost as managing and changing objects in a scene is now easier and faster to do. New instances of the Template can be placed in the scene with the Editor. These instances have a link to the Template asset, so any changes to the asset will change the instances in the scene too.

Now we are able to change and update many scene entities via a single asset which is a welcome change from the tedious manual updating of multiple entities across multiple scenes.

Change all instances of Templates in one click! 🚀

Other features of the Template system also include:

  • Adding instances in the Scene editor (including drag and drop support of template assets to the Hierarchy panel)
  • Overriding properties on a per instance basis
  • Nested Templates which allows referencing a Template in another Template
  • Creating a new instances via code from an asset reference

In terms of how they can be used, we have been beta-testing the feature since early 2020 (big thanks to all those that have given us feedback and bug reports 🙏) and some of the use cases we've seen so far include:

  • Designing and creating sections of an infinite runner game
  • Managing UI screens and instantiating them at runtime
  • Different enemy types that a script can reference to randomly generate a level

As you can see, Templates give you a wide range of flexibility of workflow options to manage and modify content in your projects.

Find out more about Templates in the User Manual and give them a try yourself!

A New UI for the PlayCanvas Editor

· 3 min read

The PlayCanvas Editor has been around since 2011. Way back then, it was called the PlayCanvas Designer. It was built on Sencha's ExtJS front end framework and looked like this:

As you can see, it sort of looks like a Windows XP application. If you think it looks retro now, it actually looked retro then! But you can more or less recognize it as PlayCanvas. The Pack Explorer is now the Hierarchy panel on the left. The Attribute Editor is now the Inspector. You can even see the 'Who's Online' bar to the bottom right, which is still around today. We decided quite quickly to drop the WinXP aesthetic by adopting a darker theme in September 2013:

This refresh was definitely an improvement and it was the start of the Designer finding a personality of its own. But after this, the team was struggling to iterate quickly. We took the very difficult decision to throw away the entire ExtJS-based Designer application and rewrite it from scratch using the incredible Vanilla JS framework. And thus, by early 2015, the PlayCanvas Editor was born:

This initial version of the Editor should be much more recognizable. The toolbar and panels are all still in the same location. But today, the Editor packs in far more functionality and is much more powerful.

It was originally written in ES5 and a subset of CSS that would enable the Editor to work in browsers all the way back to IE11. Late last year, we embarked on the next major overhaul for the Editor, with the following goals:

  • Create a clean, structured underlying Editor API (more on this later)
  • Adopt ES6 (let's get with the times!)
  • Adopt CSS grid to make managing the Editor's layout easier
  • Refresh and refine the front-end design

We've slowly been phasing in the new front-end over the last several months, first deploying an updated Hierarchy Panel and then a new Inspector Panel. Today, we're proud to announce the final step in the rollout - the new Asset Panel:

To the end user, the most obvious change is the addition of the Asset Panel's Details View. As an alternative to thumbnails, you can now see a linear list of assets and even sort them on size and type.

We expect that this will rapidly become the default view for most PlayCanvas developers. No more mouse hovering to read long filenames!

So what's next? Earlier, I mentioned that this completely rebuilt Editor front-end is built on a new, clean, object-oriented API. It is our plan to release this API publicly, once it is ready. This will enable you to write extensions and customizations to the Editor that will culminate in a full plugin system. Stay tuned for further details of that. But in the meantime, let us know what you think by joining the conversation on the forum!

Introducing the PlayCanvas Localization System

· One min read

Are you shipping your PlayCanvas app or game in just one language? You may be preventing international users from enjoying it! Today, we are happy to announce the arrival of a localization system built right into the PlayCanvas Editor!

Bitmoji Party Localized
PlayCanvas-powered Bitmoji Party localized into English, Spanish and French

The system works in tandem with PlayCanvas' text element component and it's super-easy to use. The text element interface now provides a 'Localized' property and when checked, you can enter a Key instead of a Text string.

Localized String
New text element properties for enabling localized text

The Key is the string used to look up a localized string based on the user's currently selected locale. The localized string data is stored in JSON assets and is documented, along with the rest of the system, here. You can even preview your localized User Interface by choosing a locale in the Editor Settings panel:

Locale Setting
Locale setting in the Scene Settings panel

We look forward to playing your newly localized games!